Adding bed making into your daily routine is a simple way to dramatically increase the beauty of your home. Once it becomes a habit, it is very quick to do as well.
Your bed is also an opportunity to be creative as there are literally hundreds, if not thousands of ways to style your bed.
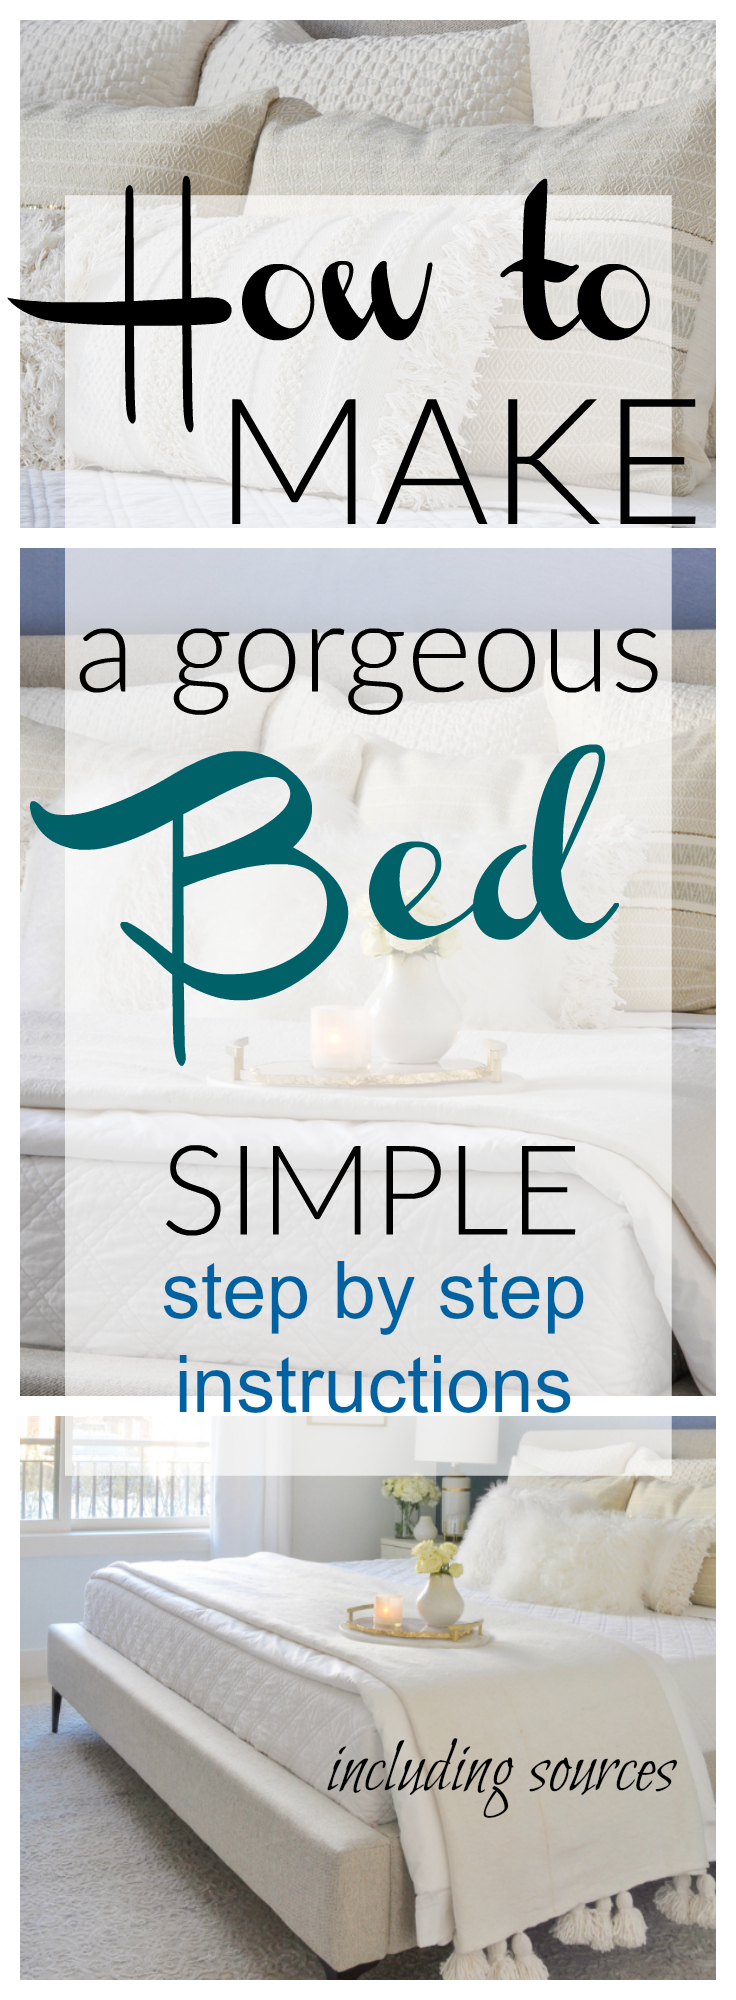
Today I will be sharing basic bed making steps. In the coming months, I’ll provide additional styling ideas, so be sure to leave your questions in the comment section!
*This post contains affiliate links. Find our full disclosure here.

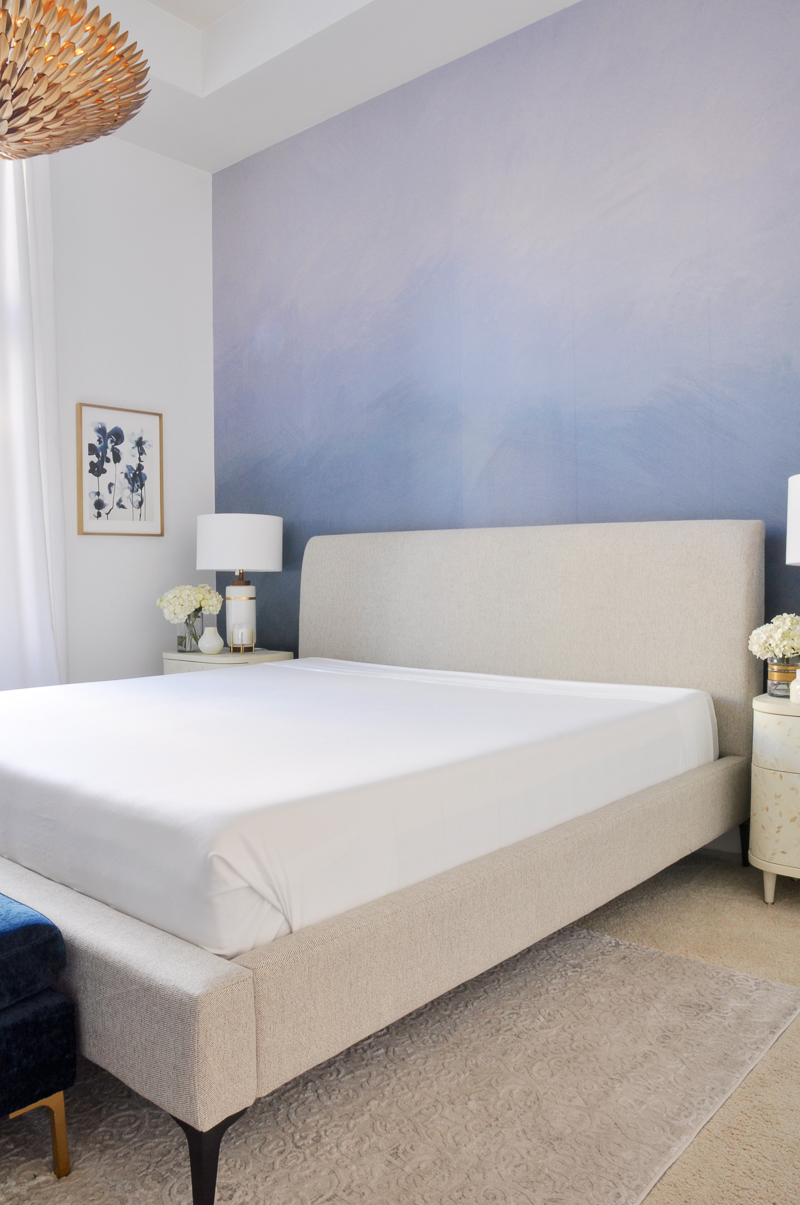
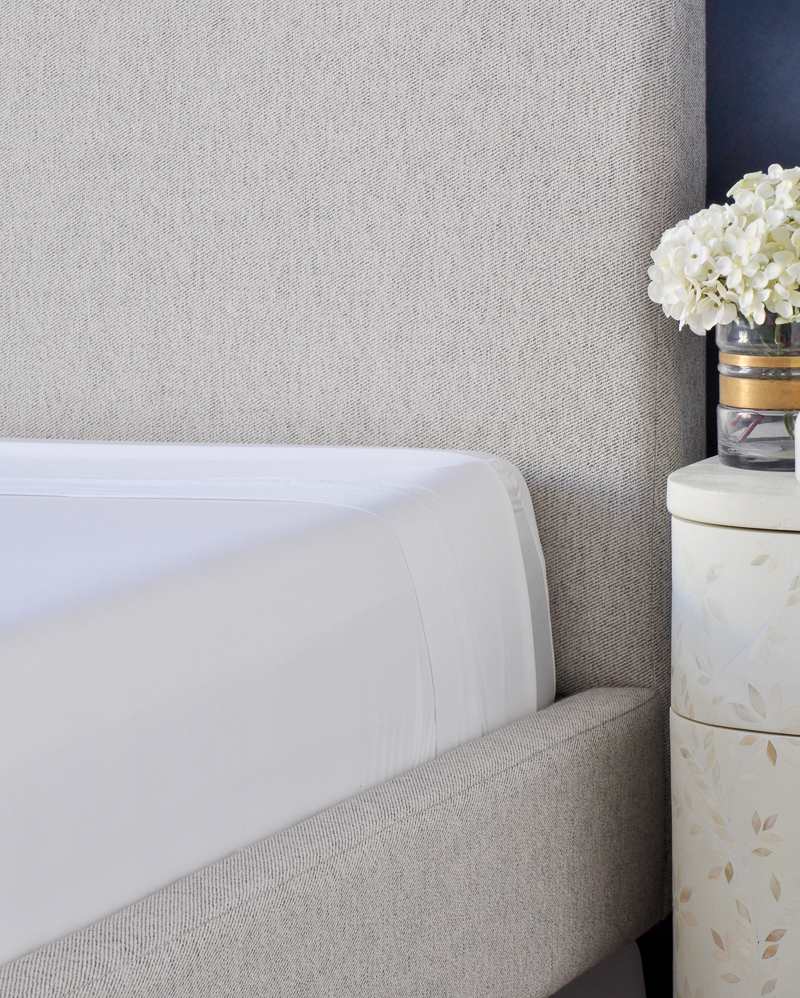
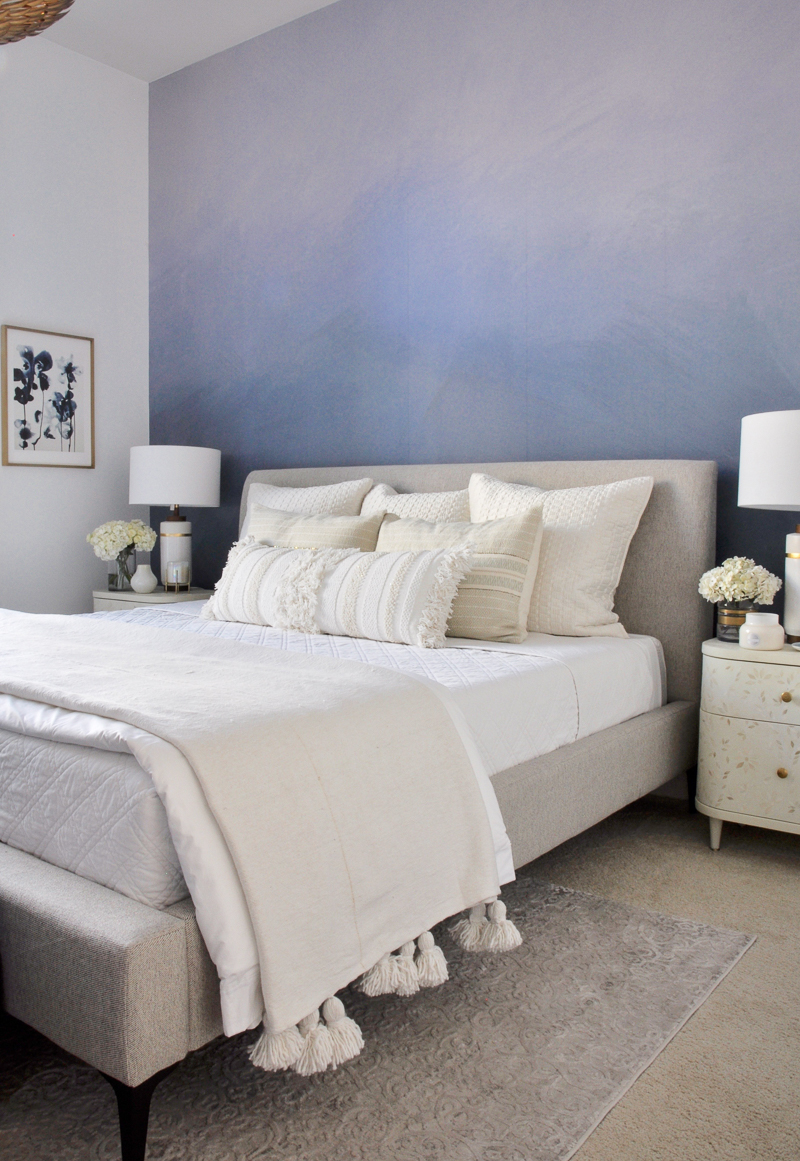
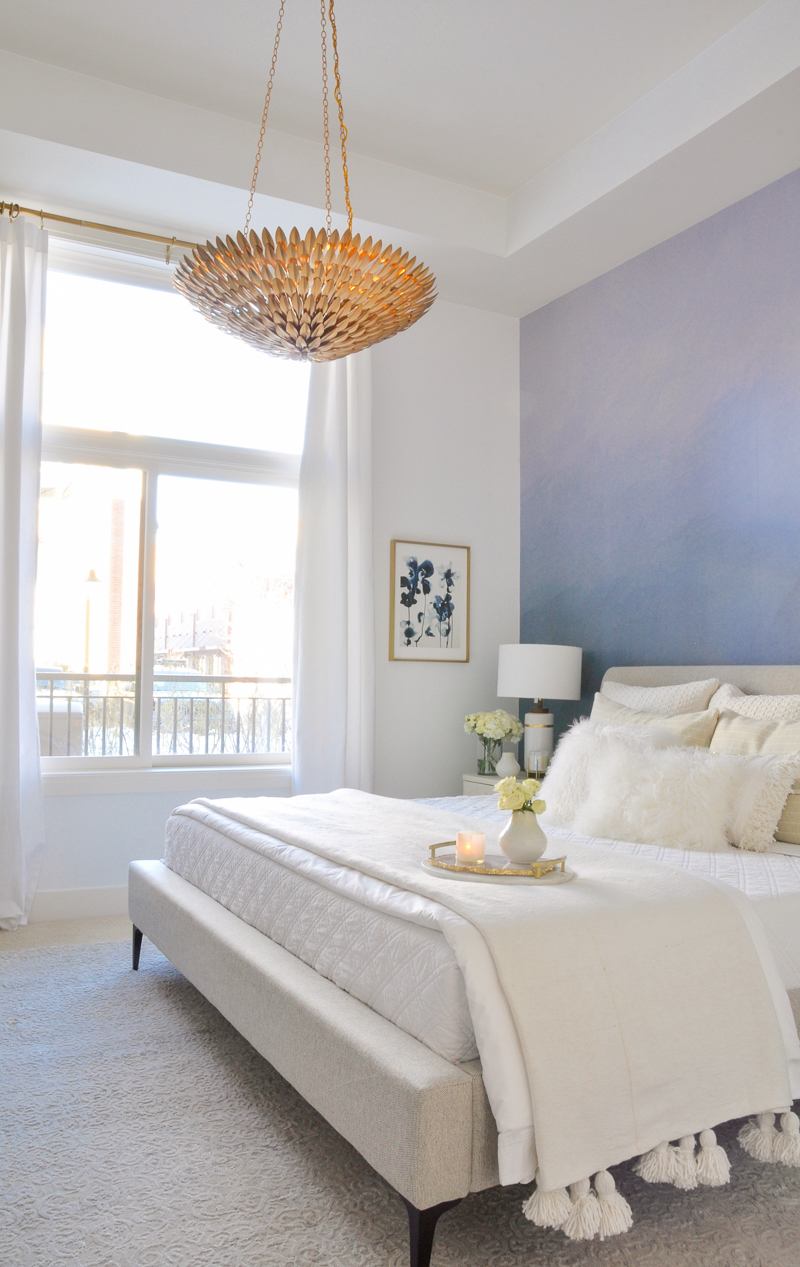
The first step to beautiful bed making is to add the bottom sheet. After you get the corners in the proper place, gently tuck the sides into the bed frame or under the mattress.
The fitted sheet should be smooth across the on top of the mattress.

The top sheet goes pattern down (if there is a pattern) and the edge with the thick hem goes at the top of the bed. Make sure the same length of sheet is hanging down both sides of the bed and there is plenty toward the top for folding.
I folded my top sheet down approximately 10″, but you can adjust this if you want more of the sheet to show. You will want the pattern to show when the sheet it folded down…..this is why the pattern faces down.
To get the most polished look, at the foot of the bed, tuck the end of the top sheet between the mattress and box springs or into the frame. I prefer tucking the sheet between the mattress and box spring because it helps keep the sheet in place when you sleep.
As neatly as possibly, make your corners and tuck the sides between the mattress and box springs, including the folded down top edge.

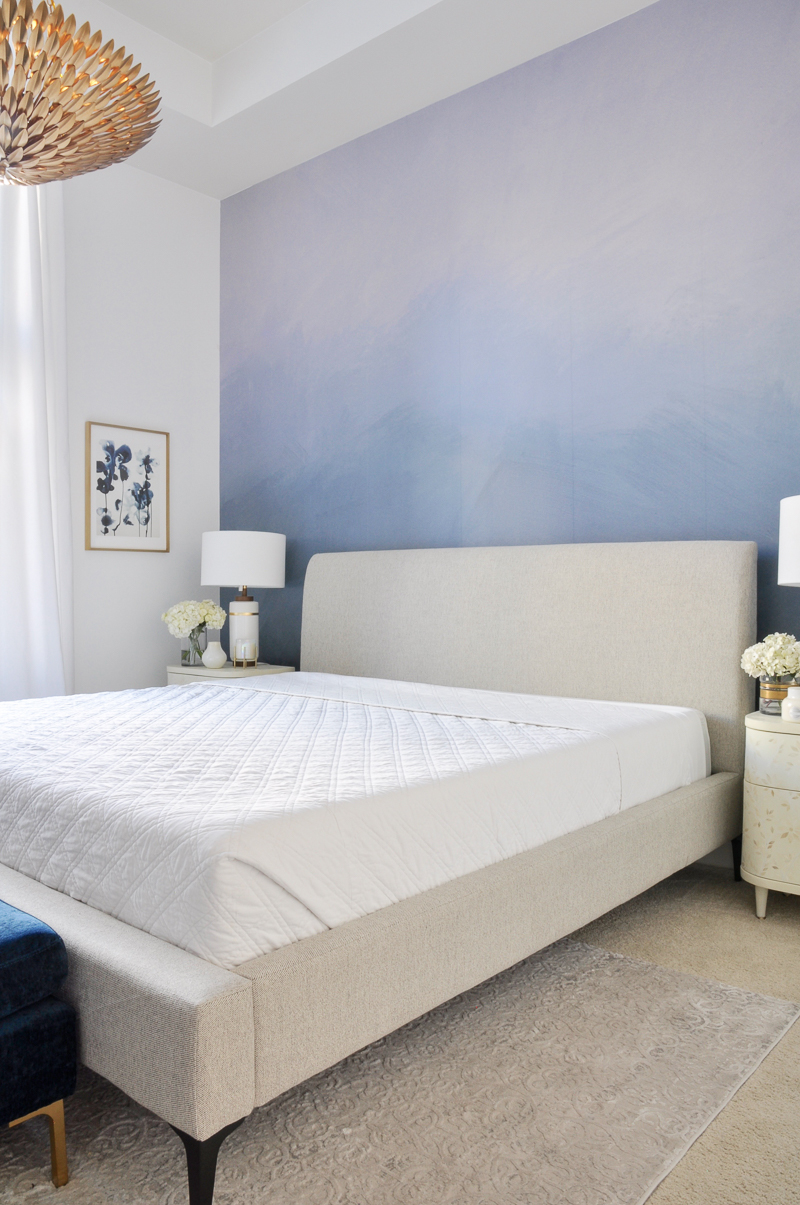
Next, follow the exact same steps for the coverlet or quilt as you did for the top sheet. The entire bed looks more elegant and finished than when the coverlet is simply laid across it.

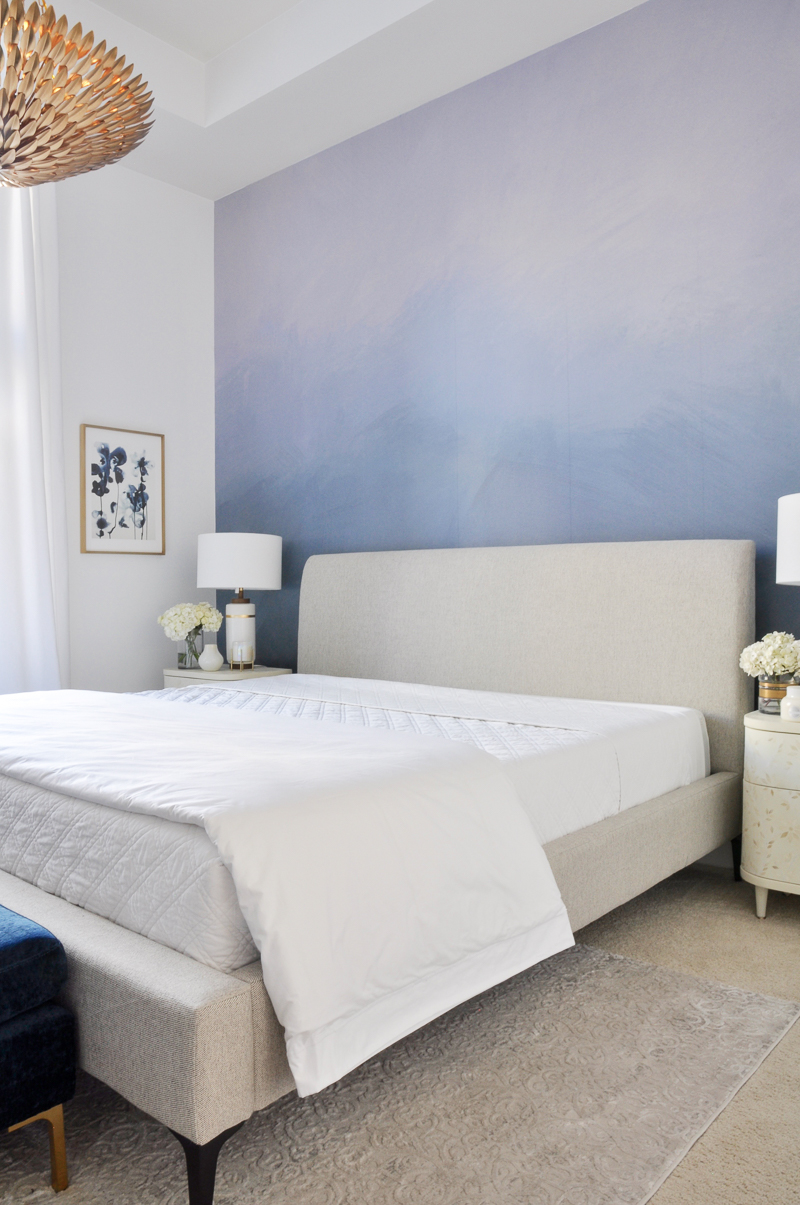
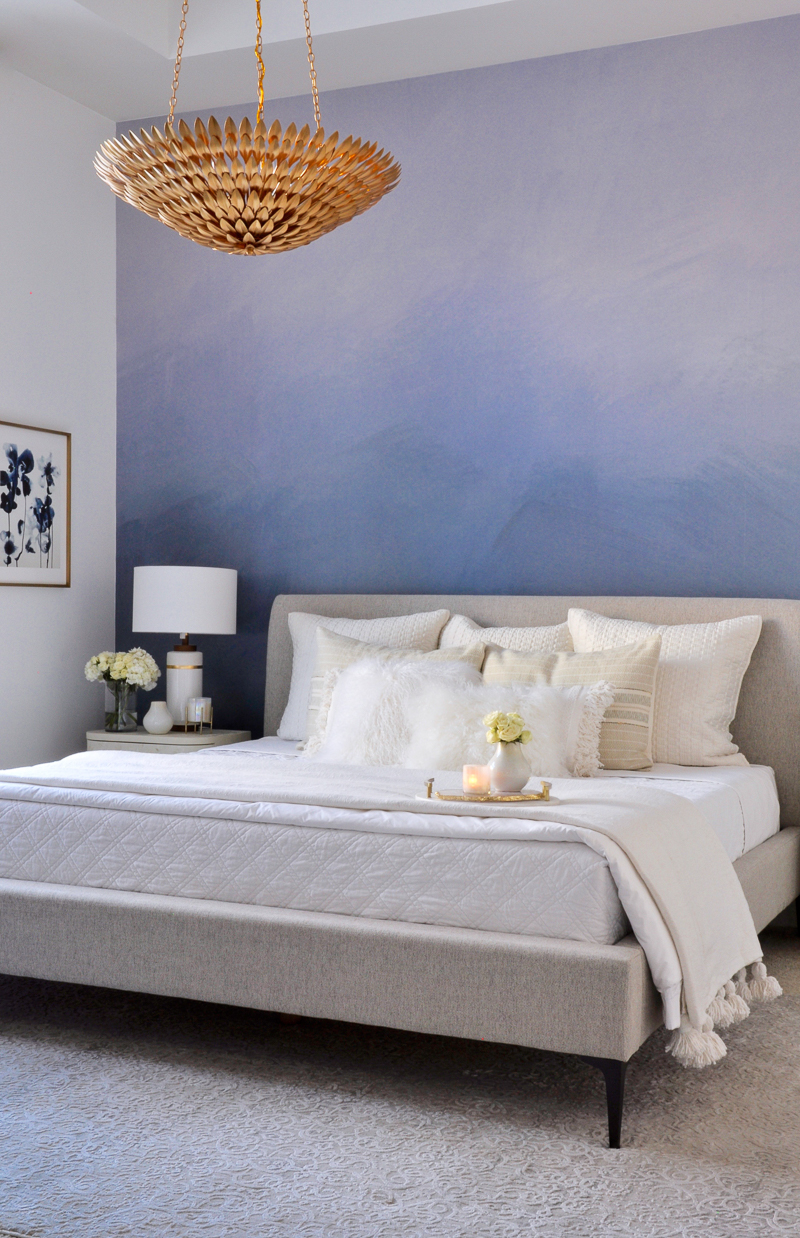
Now it is time to add the duvet. For the look I’m sharing today, fold it in thirds at the end of the bed. Folding it in thirds provides a very balanced look for your bed. For the cleanest look, place the ends of the duvet down. In other words, the middle third is the one that shows.

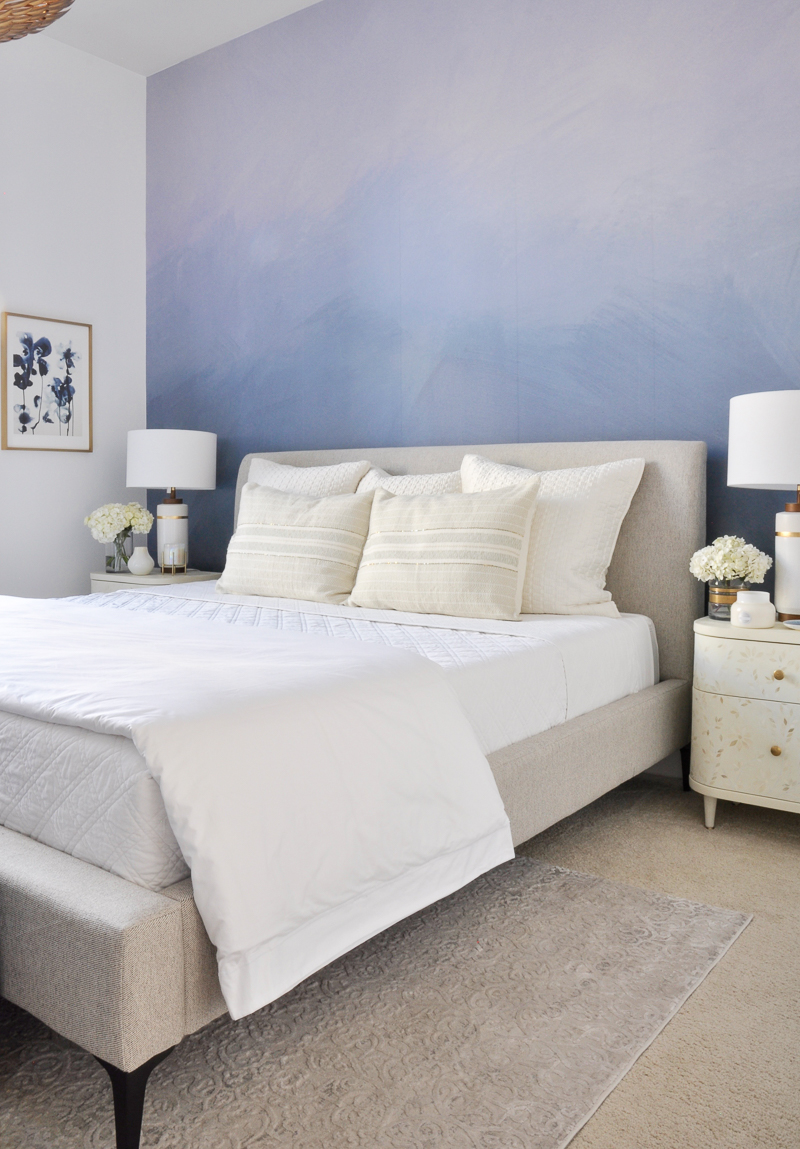
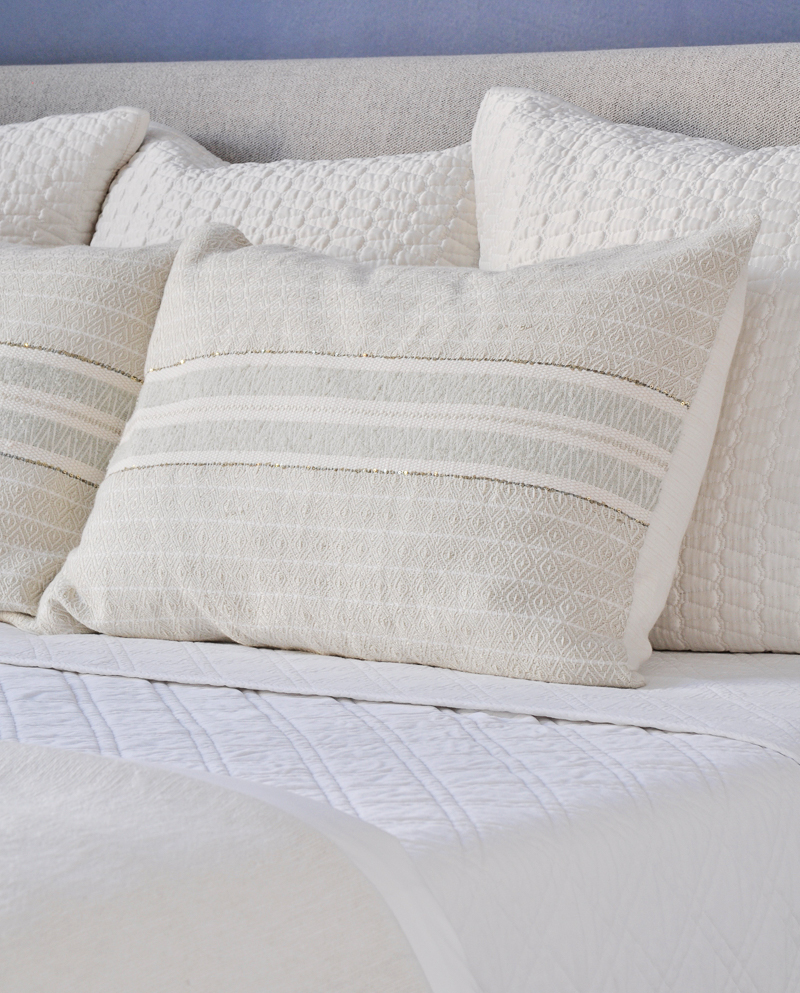
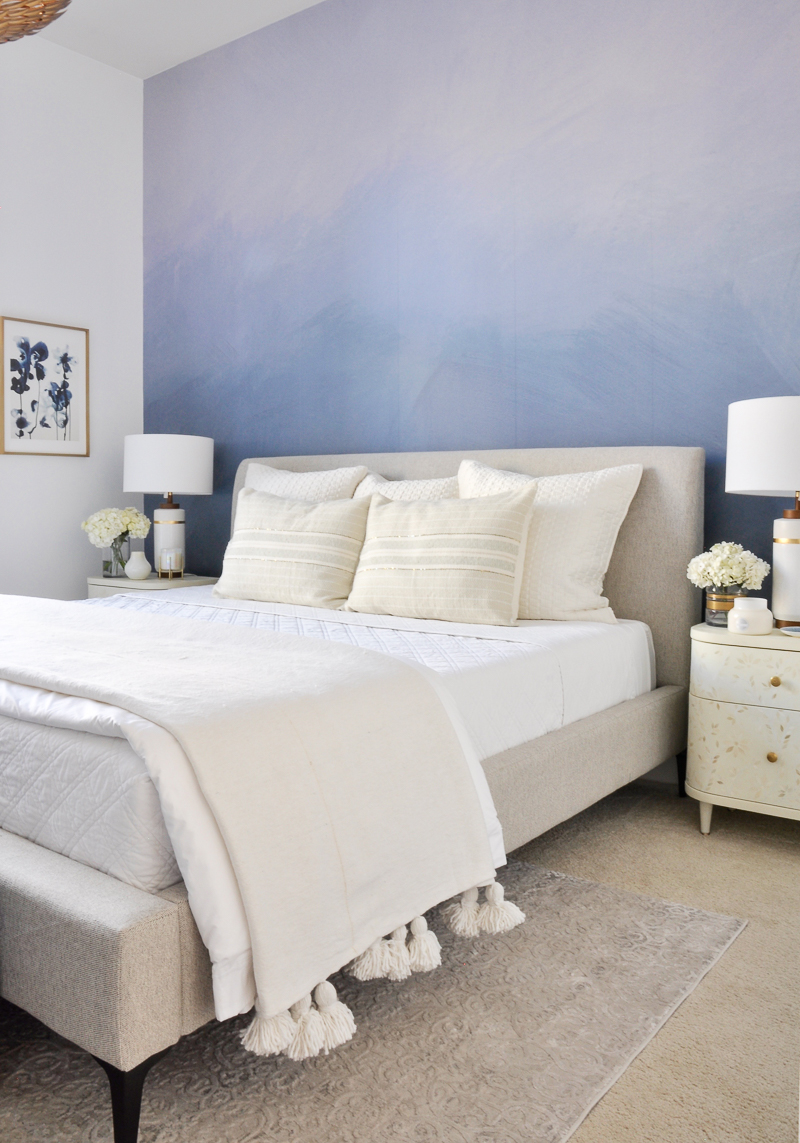
It’s time for the fun stuff! Pillows and throws make the bed beautiful. They give your bed and bedroom a finished look. I like to start with euros. These are typically 26″x 26″. I often put the pillows we sleep with behind the euros, but today I will simply show the decorative ones.
Before placing the euros on the bed, always fluff them. You can do this by grabbing the sides and squeezing them in and pulling them out, sort of like clapping.
Once they are fluffed, place them standing up, leaning against the headboard of your bed. I recommend using three on a king size bed, two on a queen or double bed, and one on a twin.
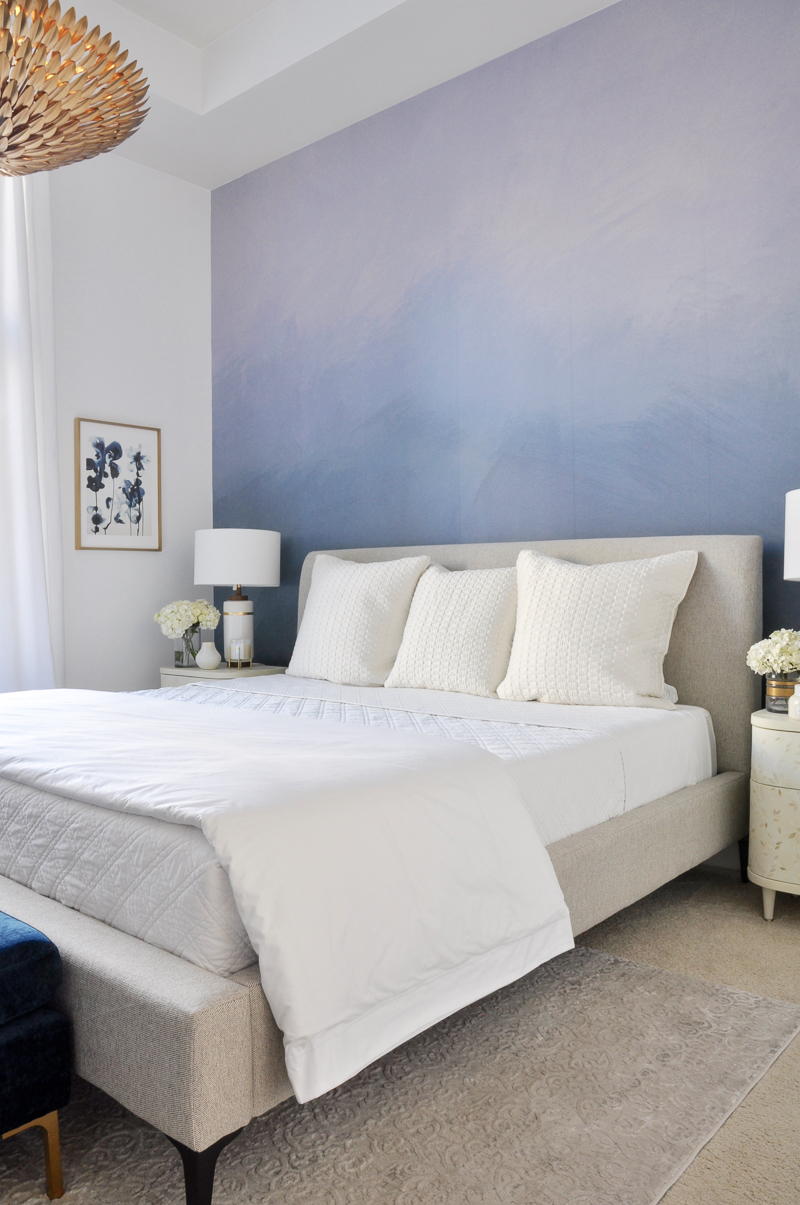


Next, add standard shams. On a king size bed, you can add king shams rather than standard shams.
Be sure to remember to fluff these as well.

I have a weakness for throws. In fact, I might be a bit of a throw hoarder. There, I admitted it.
They are extremely functional and add a layer of beauty to your bed.
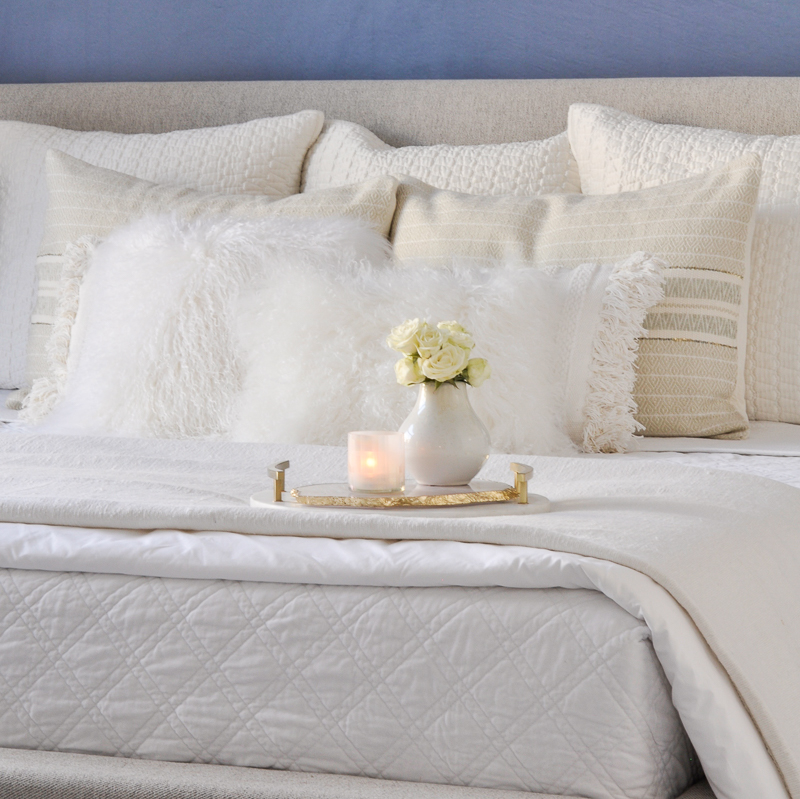
I especially adore oversized throws, like the one I used here. Simply fold it at the end of the bed.

I am pretty obsessed with large lumbars these days. You can stop at this step and have a gorgeous, tailored bed.
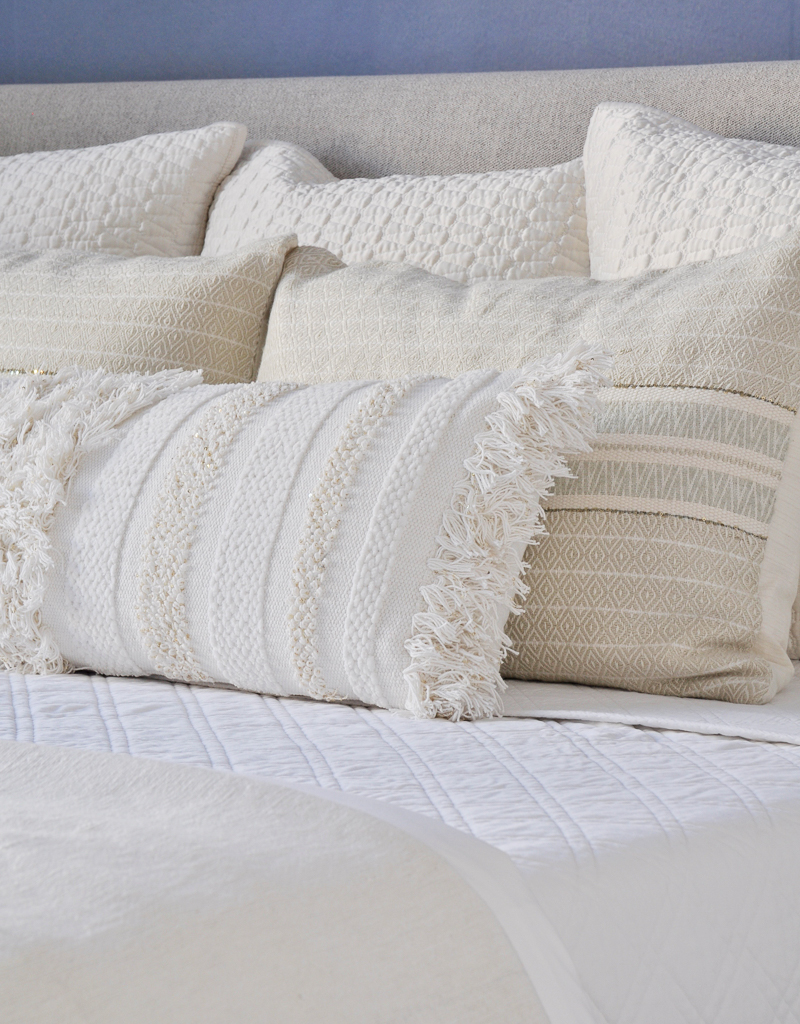

If you choose to add more throw pillows, your chance to get creative accelerates now. The sky is the limit once you get to this step. Try including a couple of faux fur pillows for an extra cozy vibe.
There you have it! I hope you feel confident bed making basics. Soon, I plan to share more styling tips to give you many creative options to fit your taste and style. If you would like to be sure not to miss future posts and design inspiration, we would love for you to sign up for our email list.

Bed | Wallpaper | Chandelier | Nightstands | Bench | Side Table | Rug | Lamps | Mattress
Coverlet | Duvet | Tassel Throw | Tassel Throw – similar | Euro Shams | Standard Shams
Lumbar | Faux Fur Throw Pillow – Square | Faux fur rectangular pillow
Sheets | Comforter | Art – Indigo
Curtain Rod | Curtain Rings | Curtain Panels
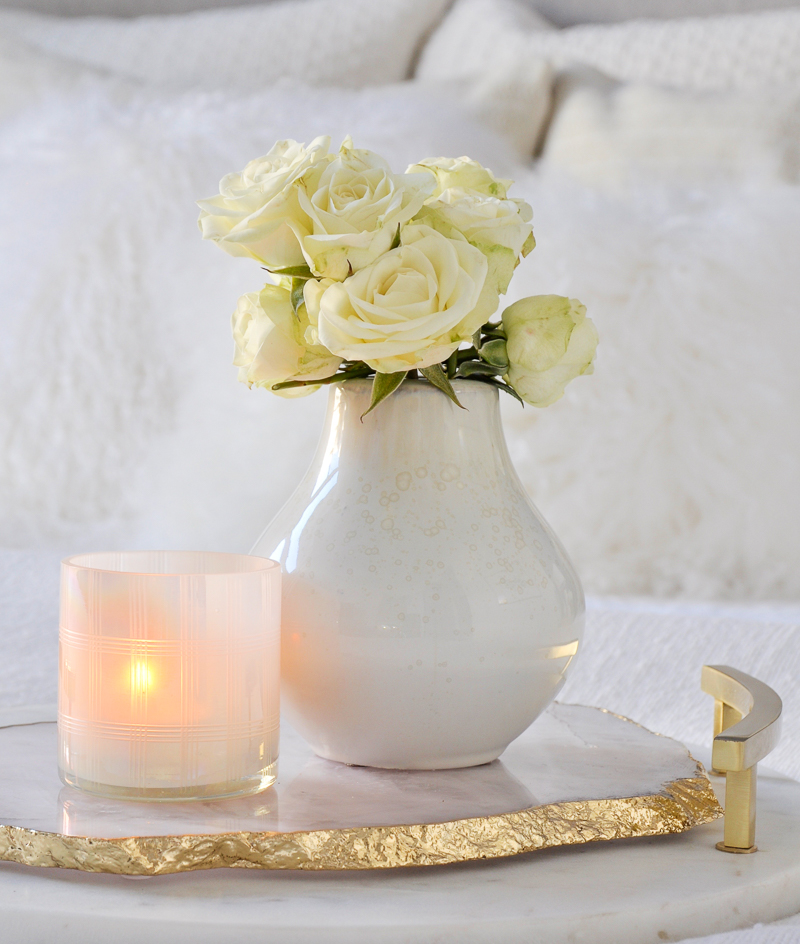
Small White Vase | White Iridescent Candle | Green Vase | Trinket Holders | Wide Glass Vase
Tray | Agate Tray | Votive | Small White Vase
Paint Color – Benjamin Moore Chantilly Lace
Stay connected…..
Click on the Image to Subscribe

SOCIAL
Instagram | Pinterest | Facebook

Hi, Jennifer. Thank you for this post. When you are ready to go to bed, do you just throw all the pillows in a corner somewhere? I don’t know what to do with mine! ??
Hi Maureen! We normally have a bench at the end of our bed. I moved it for this post so each step would be clear. 🙂
I have a question for you…. I have a pillow top king sized mattress that is impossible to find a coverlet long enough to drape over the sides of the mattress let alone tuck in! The mattress was too hard so I added a gel topper making it even thicker! I’d love to get a new mattress but it’s just not in the budget right now.i have the pick stitch white quilt/coverlet from Pottery Barn on the bed right now and I think it’s so pretty but I hate seeing the mattress and sheets exposed above the box Spring! Help!! Any suggestions for this problem?
Hi Brenda! I wish I knew of an extra wide coverlet, but I don’t. I’m sure you’re not the only one with this problem. If I come across something that may work for you, I’ll let you know. xo
Thanks Jennifer! I’d appreciate it!
I am new to your blog. You said the paint is BM Chantilly Lace. What is the blue behind the bed ?
Thanks
Hi Myrna! Thanks for stopping by! Behind the bed is a blue ombre wallpaper. It is linked in this post under Sources.
Hi, What about the pillows that you lay your head on? Do those pillows go behind the Euro Shams, or where do you put them. I don’t see the pillows for sleeping pictured.
Hi Rebecca! Yes, I actually mention them under the Euro shams section. I often stand them up just behind them. I’ll add an image including them soon. Thanks so much for stopping by!!!
Oh so beautiful and thank you for sharing great tips
Norma, thank you so much! I appreciate your sweet comment. xo
Is your box springs from the same company as your mattress?
Our bed doesn’t require a box spring.
Hi!
Thank you for sharing how to make the perfect bed. I’m doing well so far according to your steps. Yay! I know that you mentioned having many, many throw pillows. Do you have a storage solution for them. I have a few in my linen closet but I still have a ton more. I’m looking for some kind of storage solution for them. I.e. shelves in basement, storage bins etc. Thanks!!
Hi Ashley! There are a couple of things I do to save space. For the pillows on my bed, I have a bench or a chair in each bedroom. At night, we stack the extra pillows on these furniture pieces. The other thing I do, which saves the most space, I take the inserts out of the extra pillows and fold the pillow covers into our linen closet. Hope this helps!
I love your bed! What is the West Elm color of fabric? Thank you!
Thank you Bobbi! It is the lighter version of this bed (not custom)….. https://rstyle.me/n/c37qaqb52jf