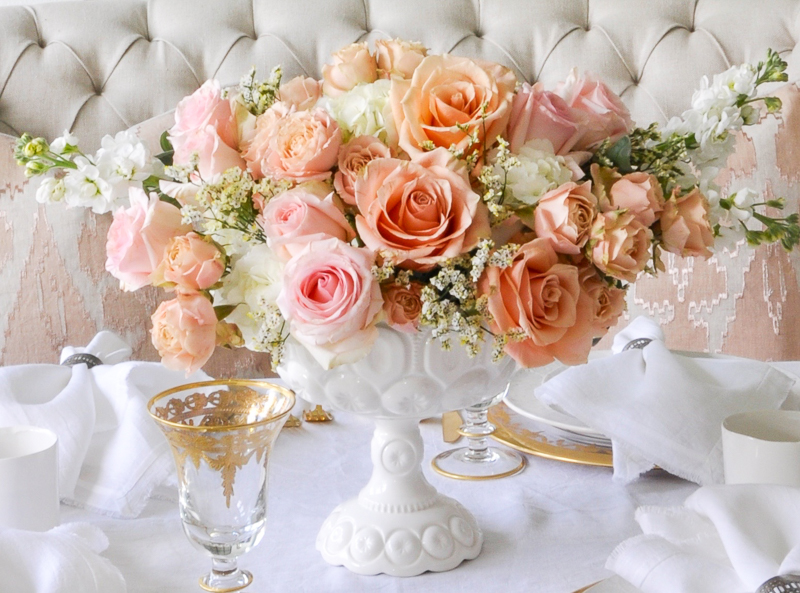
Isn’t spring wonderful? I love spring colors, spring flowers, and spring entertaining! And I love creating a spring floral arrangement.
With all of my spring loves in mind, I recently assembled a floral centerpiece and it was easy! Today, I’ll be sharing step by step instructions on how to create your very own spring floral arrangement.

Once you gather your supplies, assembly is quick. You can use the colors I chose or try a different color combination that you love.
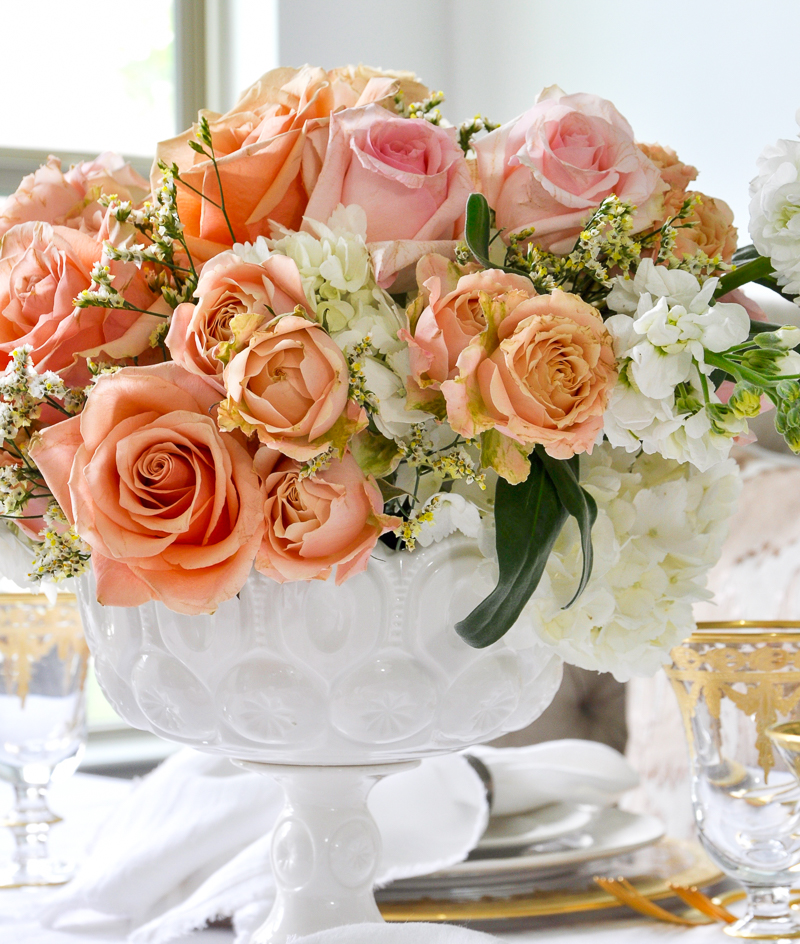
These are the items and flowers I used:
- Vessel
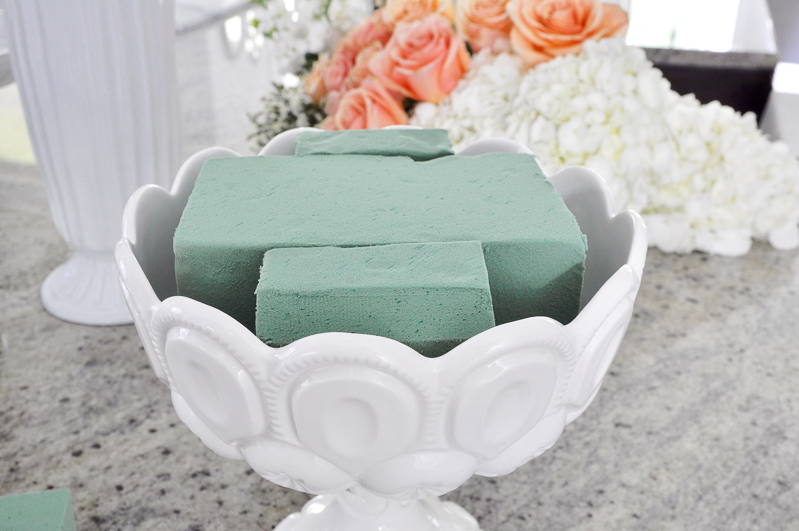
- Florist foam
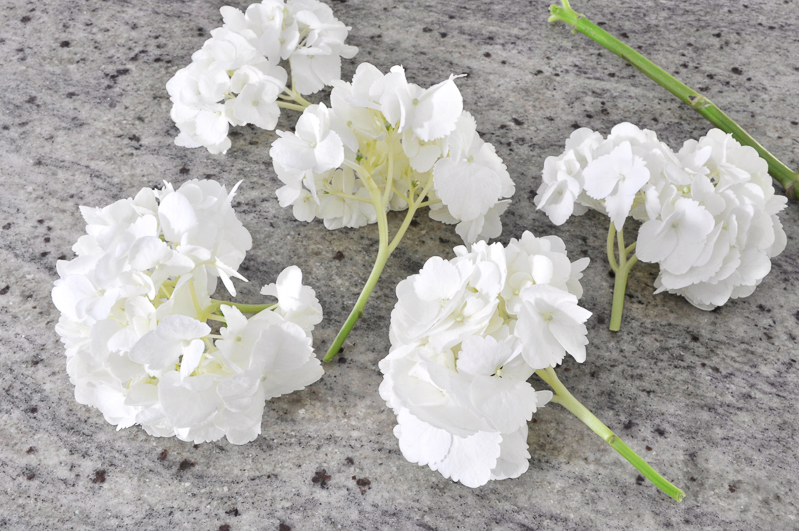
- Hydrangeas 1-2
- Roses 18
- Spray roses 12 (each stem has several blossoms)
- Filler
- Stock


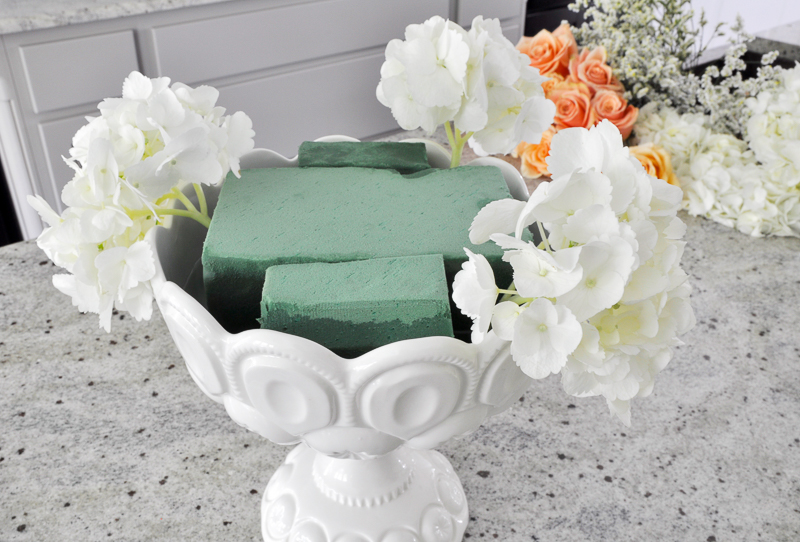
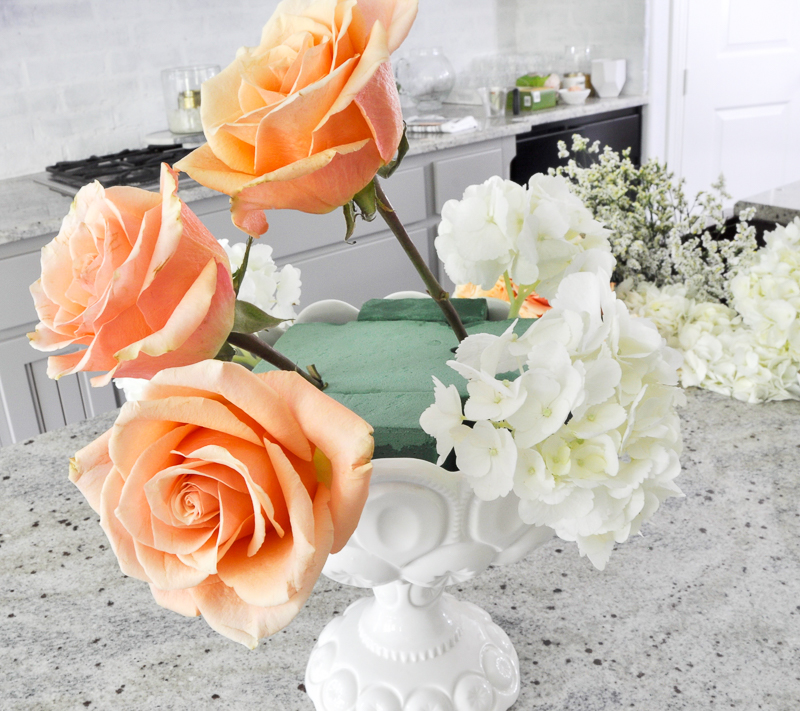
Prepare your vessel by soaking the foam according to the directions on the package. I cut mine to the right size first, then soaked it.

Before each step, you will need to trim your stems and remove the leaves. Be sure to leave enough length to secure your stems into your vessel. You can prepare all of the flowers at once if you’d like, but you may end up with a few extra flowers and want to use them with their leaves.
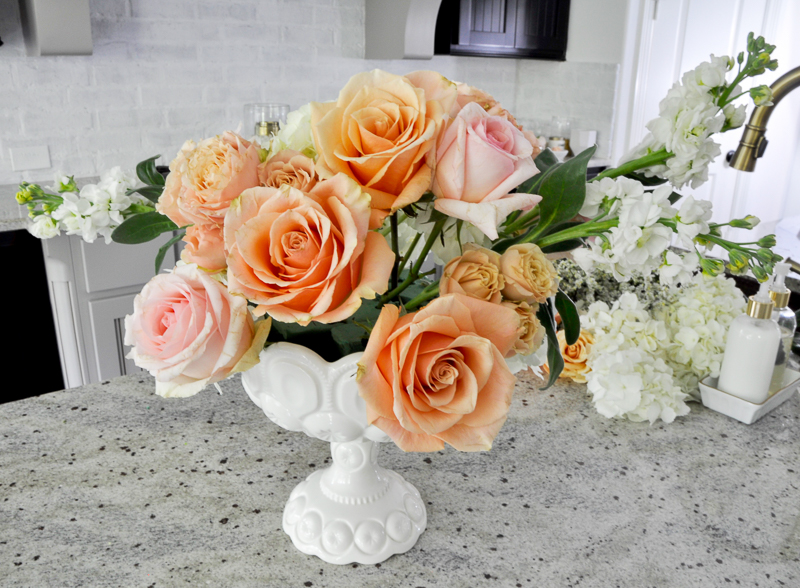
Now begin assembling your arrangement by hydrangeas. Below, you will notice that I have five hydrangea pieces. These were all from one stem. I used these smaller pieces around the edges of my pedestal vase.
Next, working in threes, begin adding your rose stems. Stick them securely into the foam.
Start with the largest roses. Also, try to use roses that are at least partially open for a more full and finished-looking arrangement.
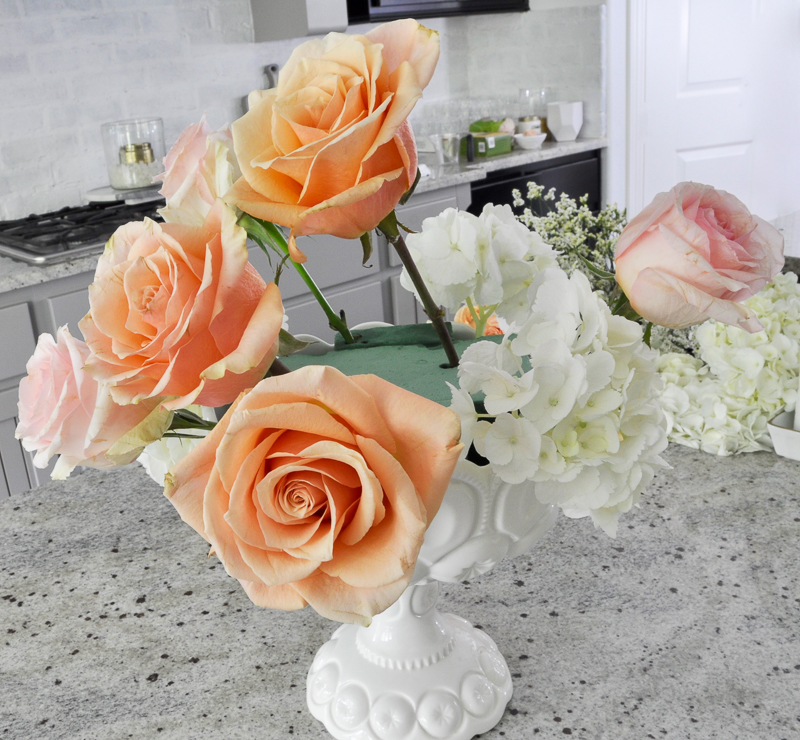
You will notice, my spray rose each stems have three flowers.

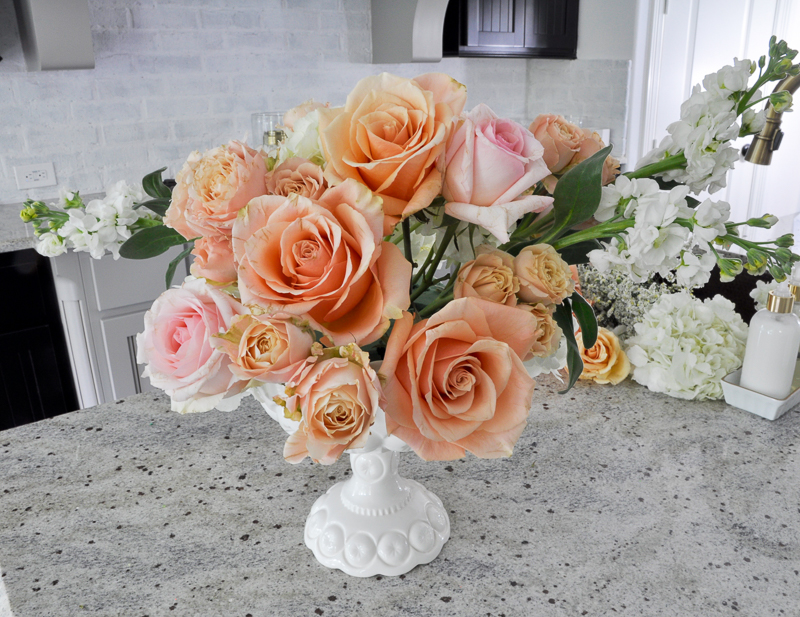
Using a few more hydrangea pieces and stock, fill some of the larger spaces between your roses.
It looks nice when you use the stock on the outer edges. I like to use one stem on one side and two on the opposite side.

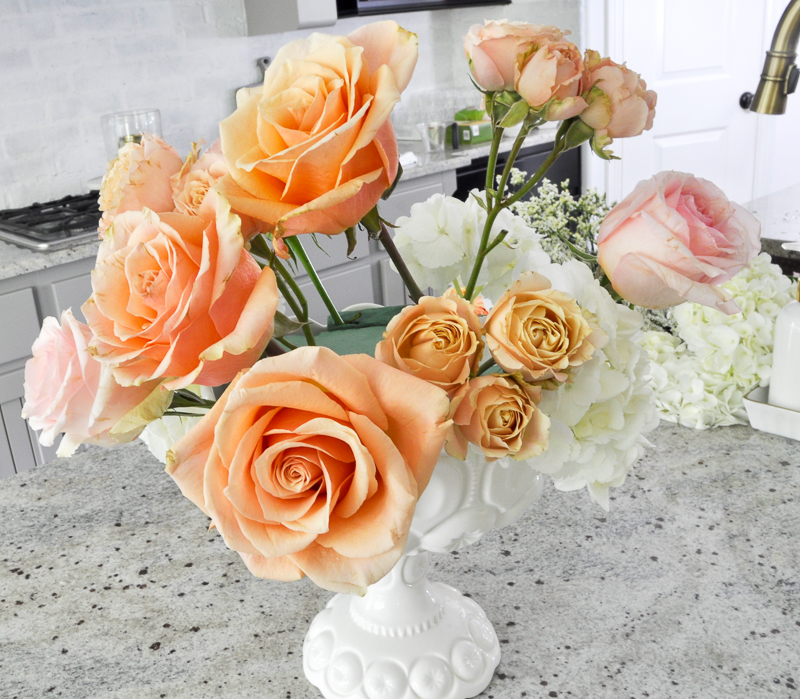
Continue adding roses and hydrangeas to fill any remaining space. Be sure to remember to fill the remaining space along the edge of your container.
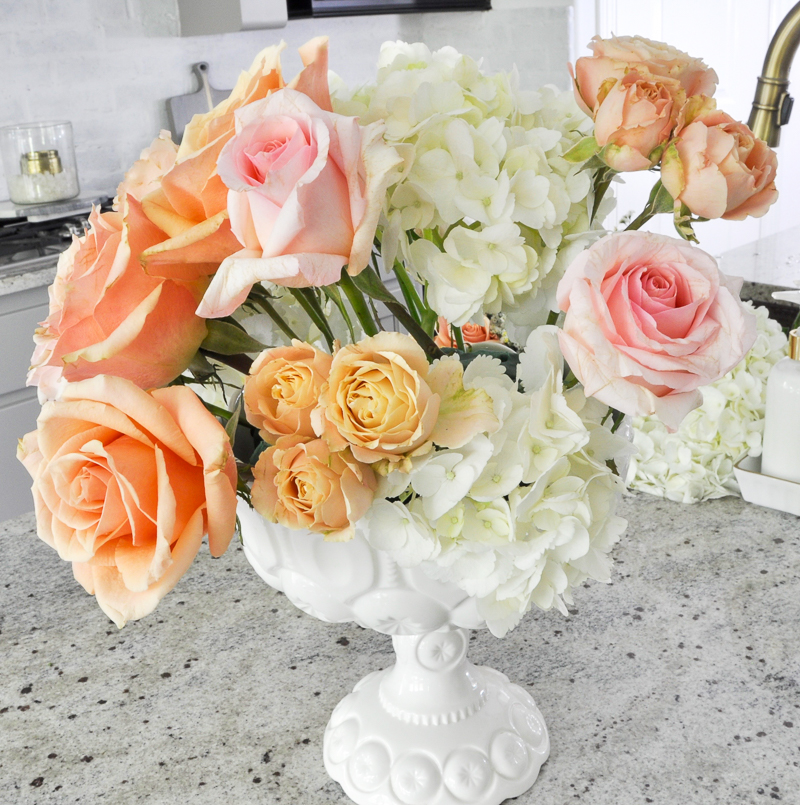
Last, add filler. It gives your arrangement a beautiful, textured, more full appearance.
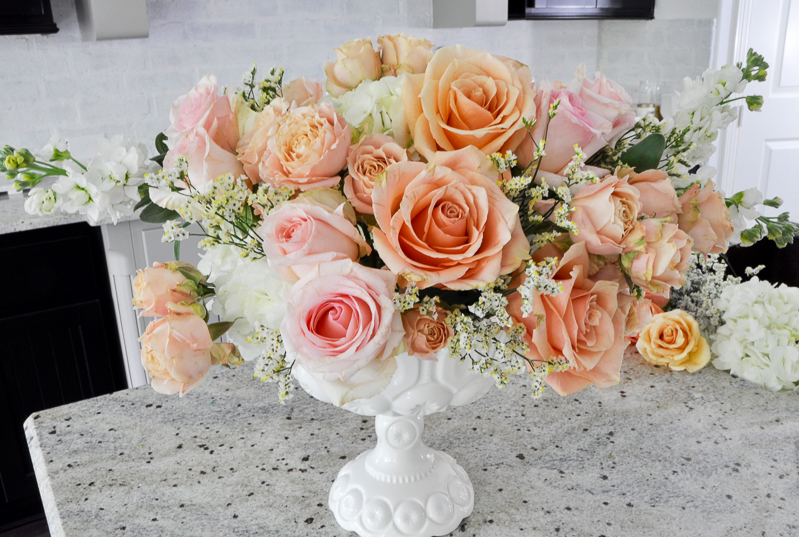
That’s it!
I placed mine on my dining table. See it HERE.

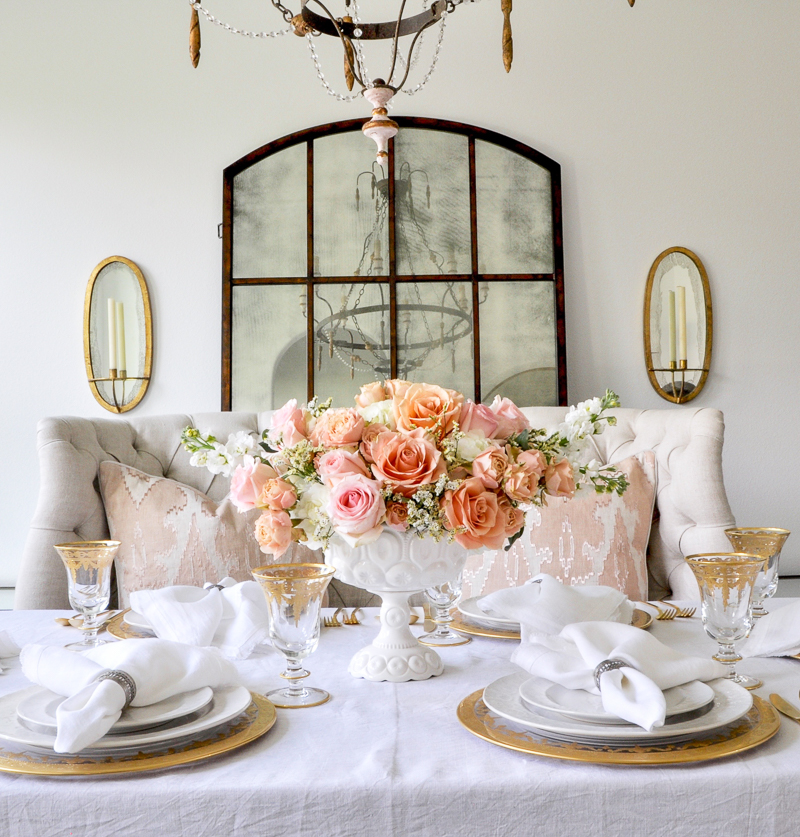
Making an arrangement like this can definitely take your dining table to the next level. It would also look gorgeous on a sideboard, a pedestal, or a console table.
As a high school girl, I secretly wanted to work at florist shop, but felt intimidated. Over time, I have realized how simple it actually is to create a beautiful arrangement!

Similar End Chairs | Similar Side Chairs | Similar Table | Leaning Mirror | Similar Settee | Side Tables
Round Mirror | Chandelier | Gold Wall Sconces | Blush Pillows
Chargers | Wine Glasses | Dinner Plate | Salad Plate | Tablecloth | Linen Napkins
Napkin Rings
Absolutely lovely… I will definitely give this a try. Thank you.
Jen, thank you for this tutorial! I always struggle to get my arrangements perfect and this is the first time I’m seeing florist foam – I think using it would make all the difference. XO, Kelly
Jen, what a great tutorial!! Now I know why your flower arrangements are always so beautiful!! xoxo
Hi, I love the way you explained this flower arrangement. Super easy and beautiful !!