Tree decorating steps can be intimidating, but they don’t have to be. Today, I’m thrilled to be sharing Christmas tree decorating step by step instructions!
Creating a beautiful tree is my favorite task of the holiday season. I love to create a tree design in a beautiful color palette that compliments my home. This doesn’t mean all-new ornaments or ribbon each year. In fact, I’ve had most of my ornaments, for a number of years!
Over the years, and after decorating many trees, I’ve learned a few tricks that I hope will help you create a Christmas tree you love!
*This post contains affiliate links. Disclosure here.
Step One – Fluff Your Tree
The first step is to fluff your tree. To do this, separate the branches and pull them apart from each other in multiple directions. Remember to reach all the way to the tree trunk to get all of the branches.
On a flocked tree, be aware of the position of the “snow”. It should be on the top side of the branches.
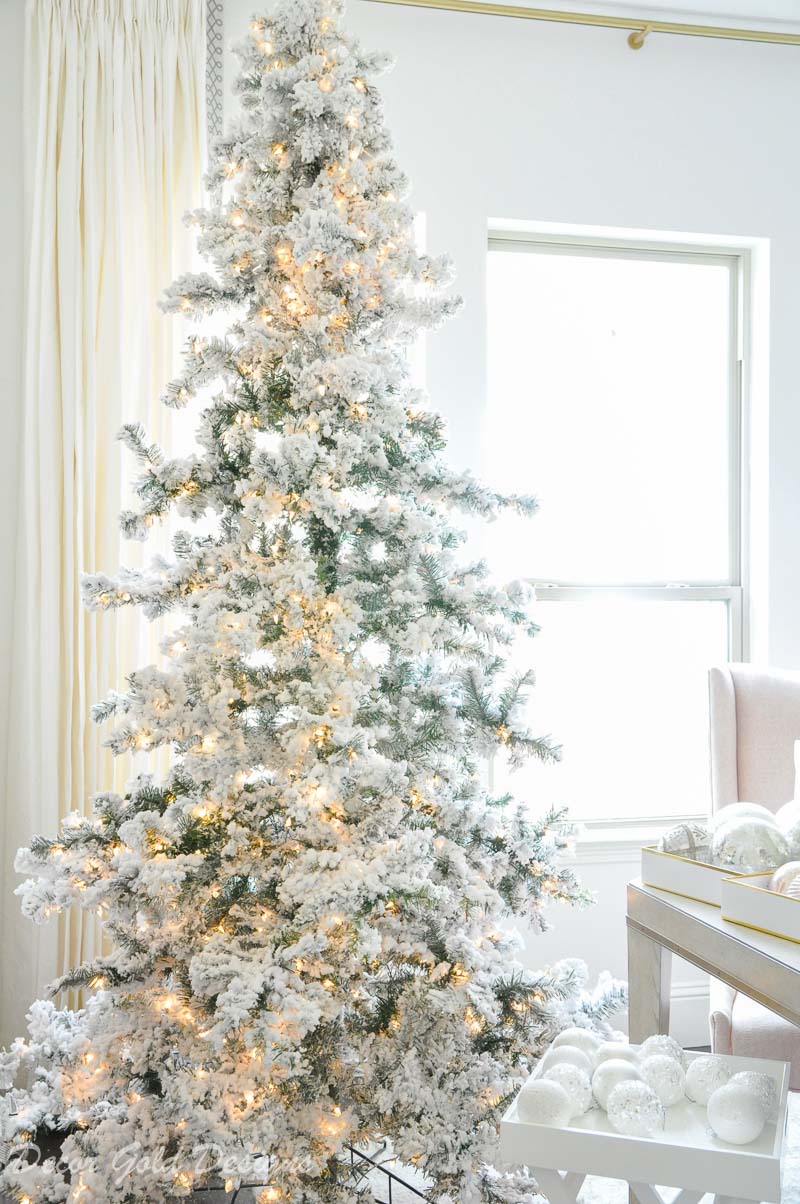
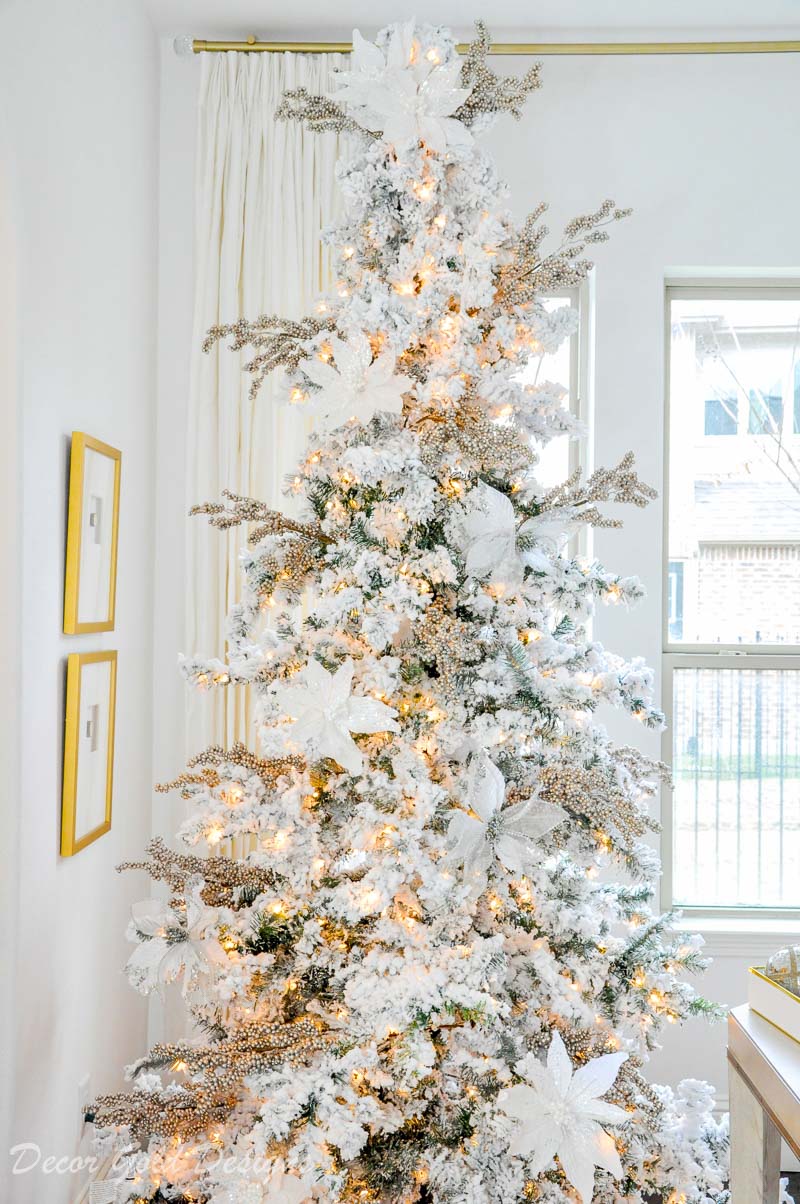
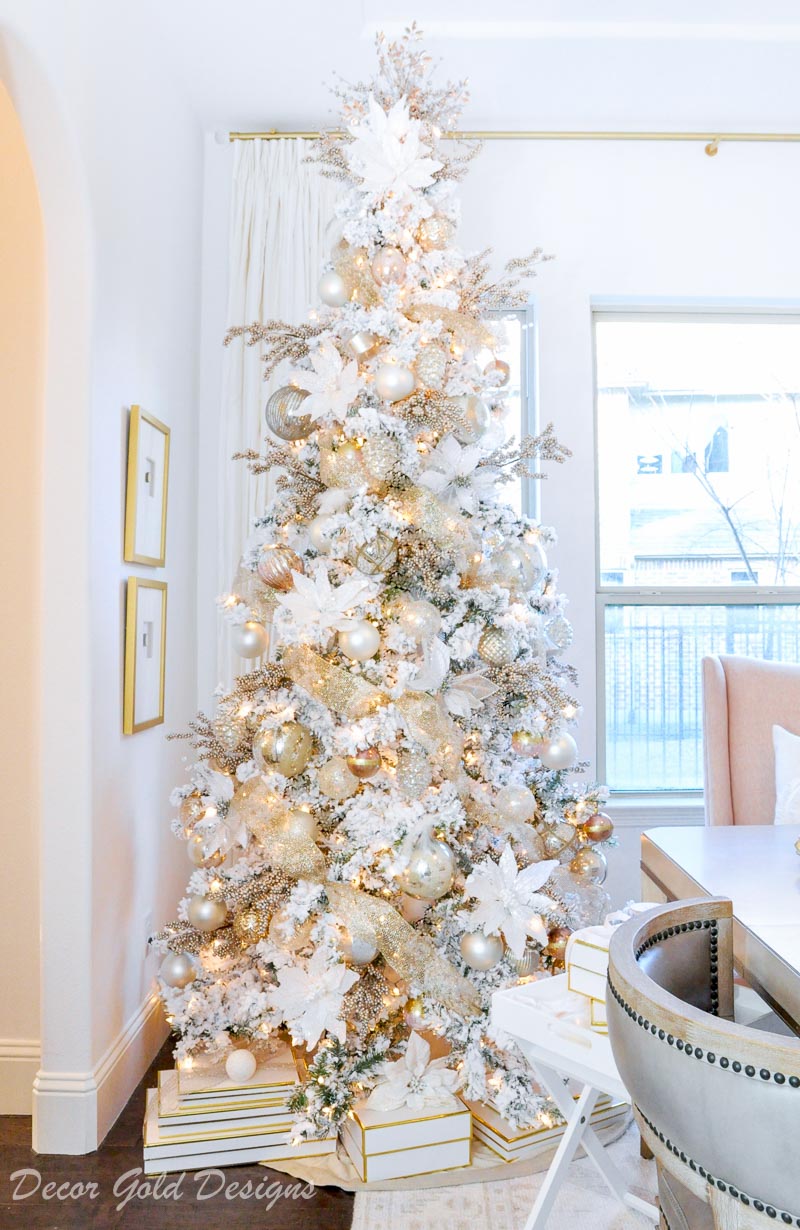
My tree isn’t the most full tree, in fact, it looks like a bit of a Grinch tree! After fluffing it and with well placed adornments, you won’t be able to tell….I promise!
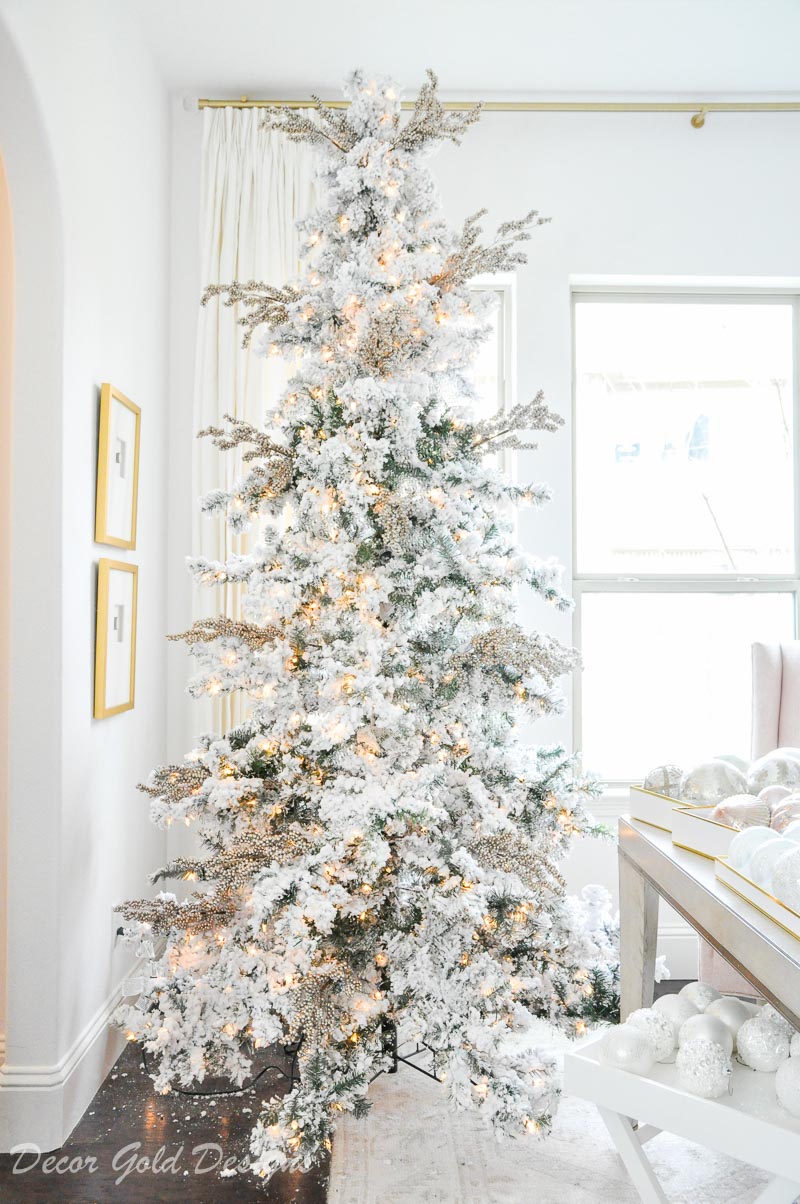
Also, the tree I’m sharing today is slender. It is a great option for rooms that are not quite large enough for a full-profile tree.
Note: If you don’t have a pre-lit tree, you can add your lights once your tree has been fluffed.
Step 2 – Add Picks
The second step in Christmas tree decorating is to add some picks. Add them before your ornaments so you can use them to fill spaces that are more sparse. You should be able to push them into the tree or rest them on a branch. If you need to secure them, try criss-crossing tree branches (the smaller ones deep inside) around the stems of your picks.
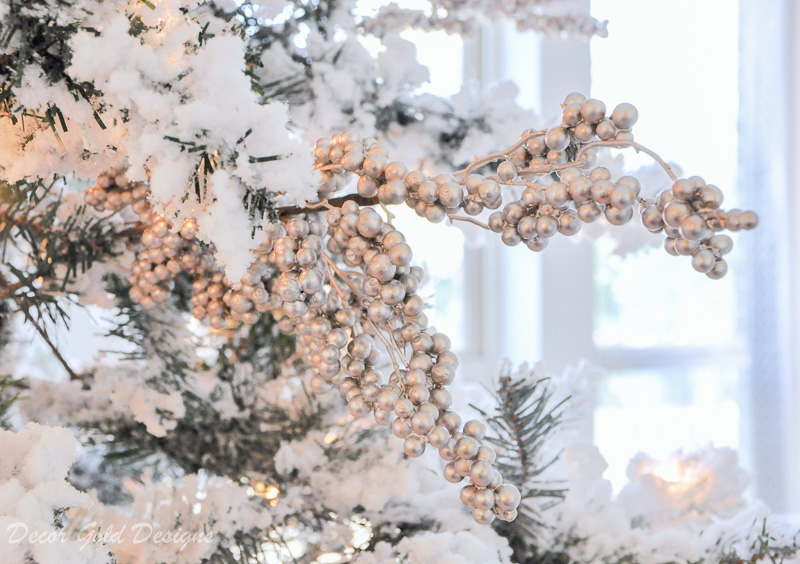
Stand back to make sure they are spread out and balanced throughout the tree.
Shop Picks

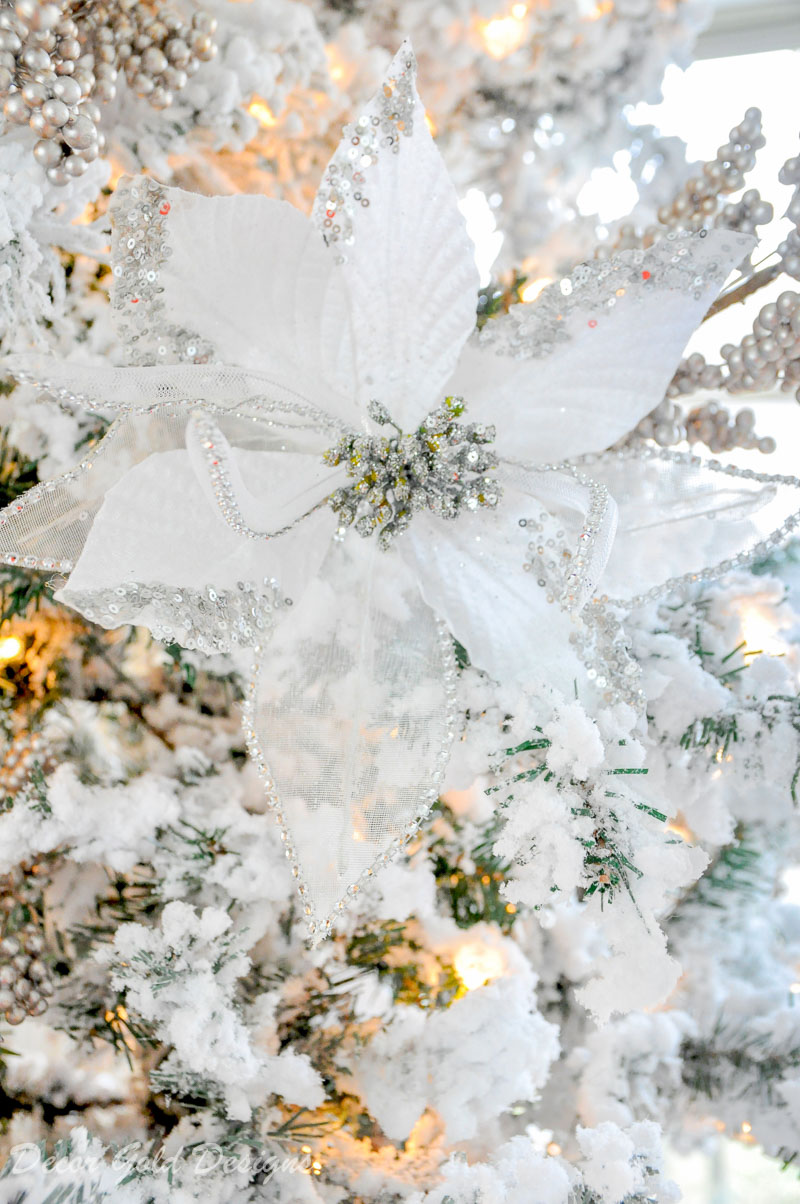
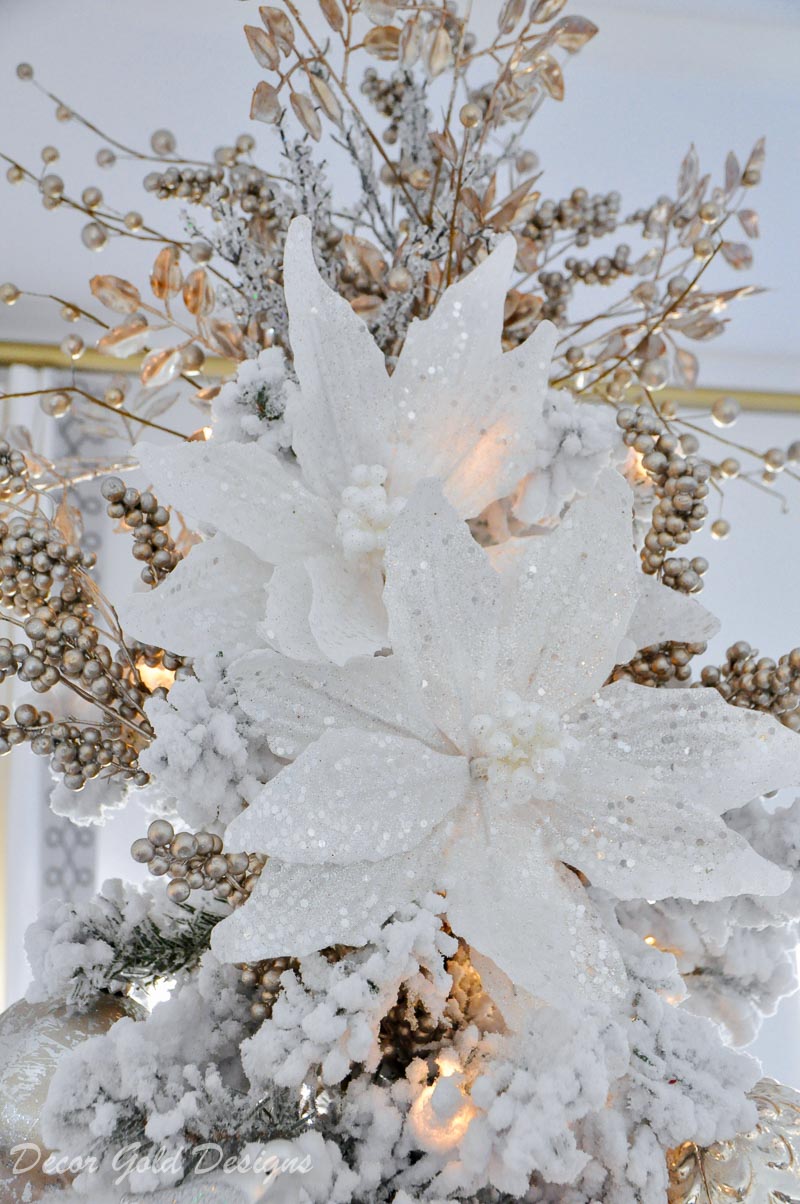
Step 3 – Add Flowers
Next, I always add faux flowers to my Christmas trees. My favorites are poinsettias and magnolias.
When you place them on your tree, fill the remaining gaps.
Shop Flowers
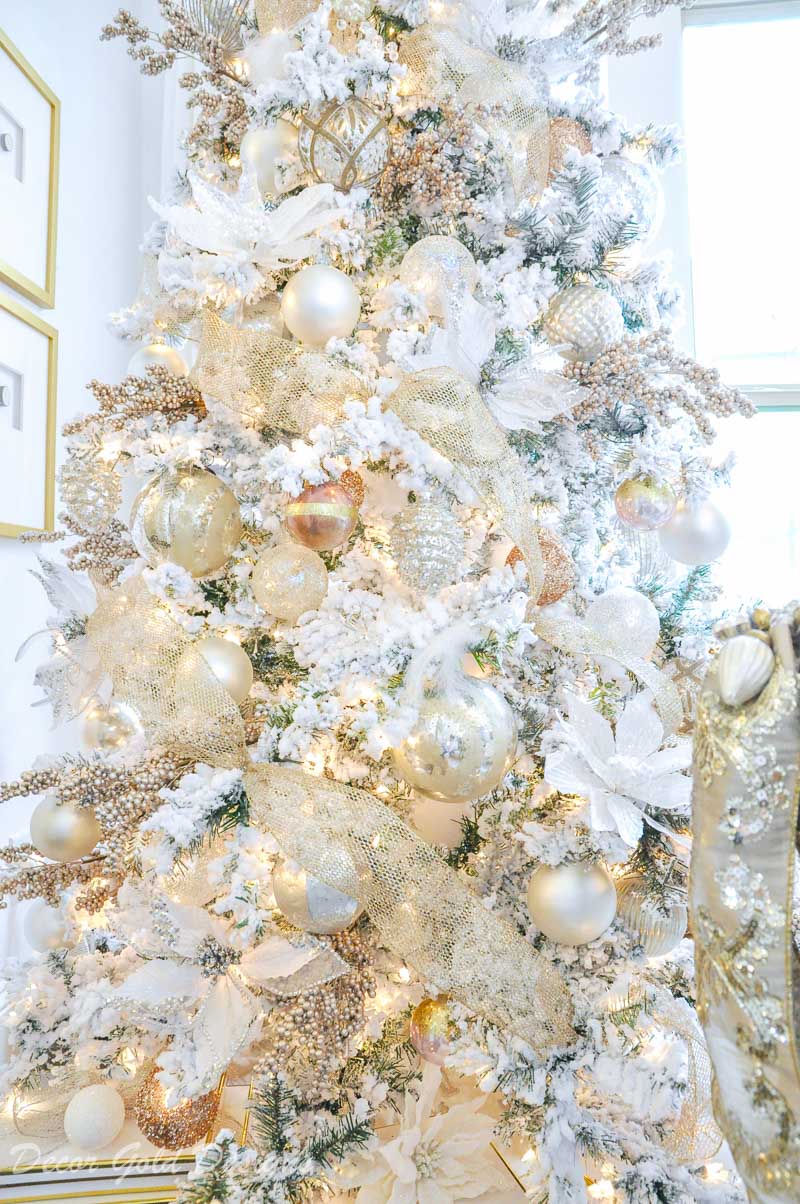
Step 4 – Add Ribbon
A lot of people add ribbon first or last. I think it is nice to add it just before or just after you add your ornaments.
Today, I am going to show you how to add it before your ornaments so you will be able to see the process clearly.
Ribbon is great for covering any remaining gaps between branches. Also, adding it at this point prevents having to work around or covering your ornaments. (If you use mesh ribbon as I have here, you won’t have to worry about covering your ornaments).
I like to use ribbon that is around 4″ or 5″ wide, but that is simply my preference. Use straightened ornament hooks or florist wire to fasten the ribbon to your tree. You can also use the wire branches to hold your ribbon.
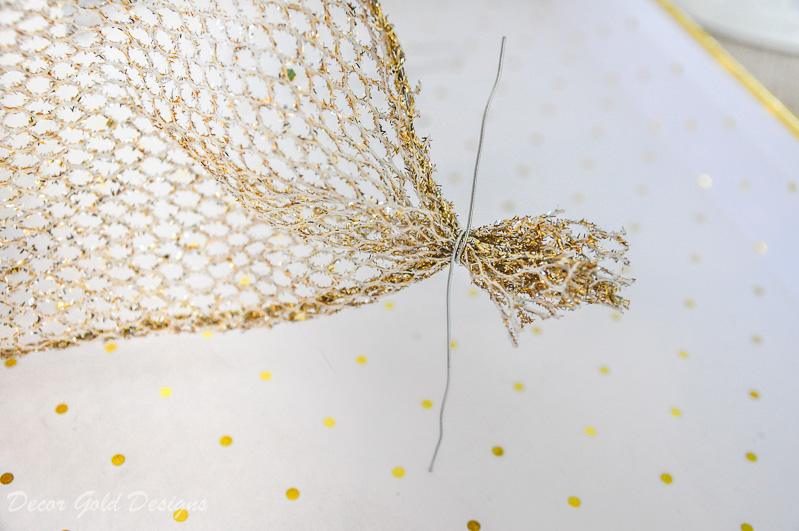
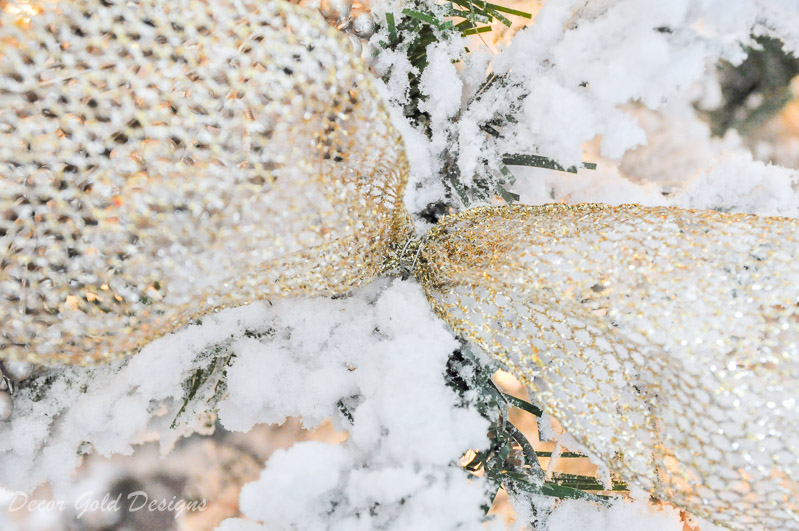
Try to get the ribbon deep into the tree. This will help create a full look.
You can keep your ribbon long and wired it in several spots or cut your ribbon to shorter, more manageable lengths. It is up to you!
Shop Ribbon
Glitter Gold Ribbon
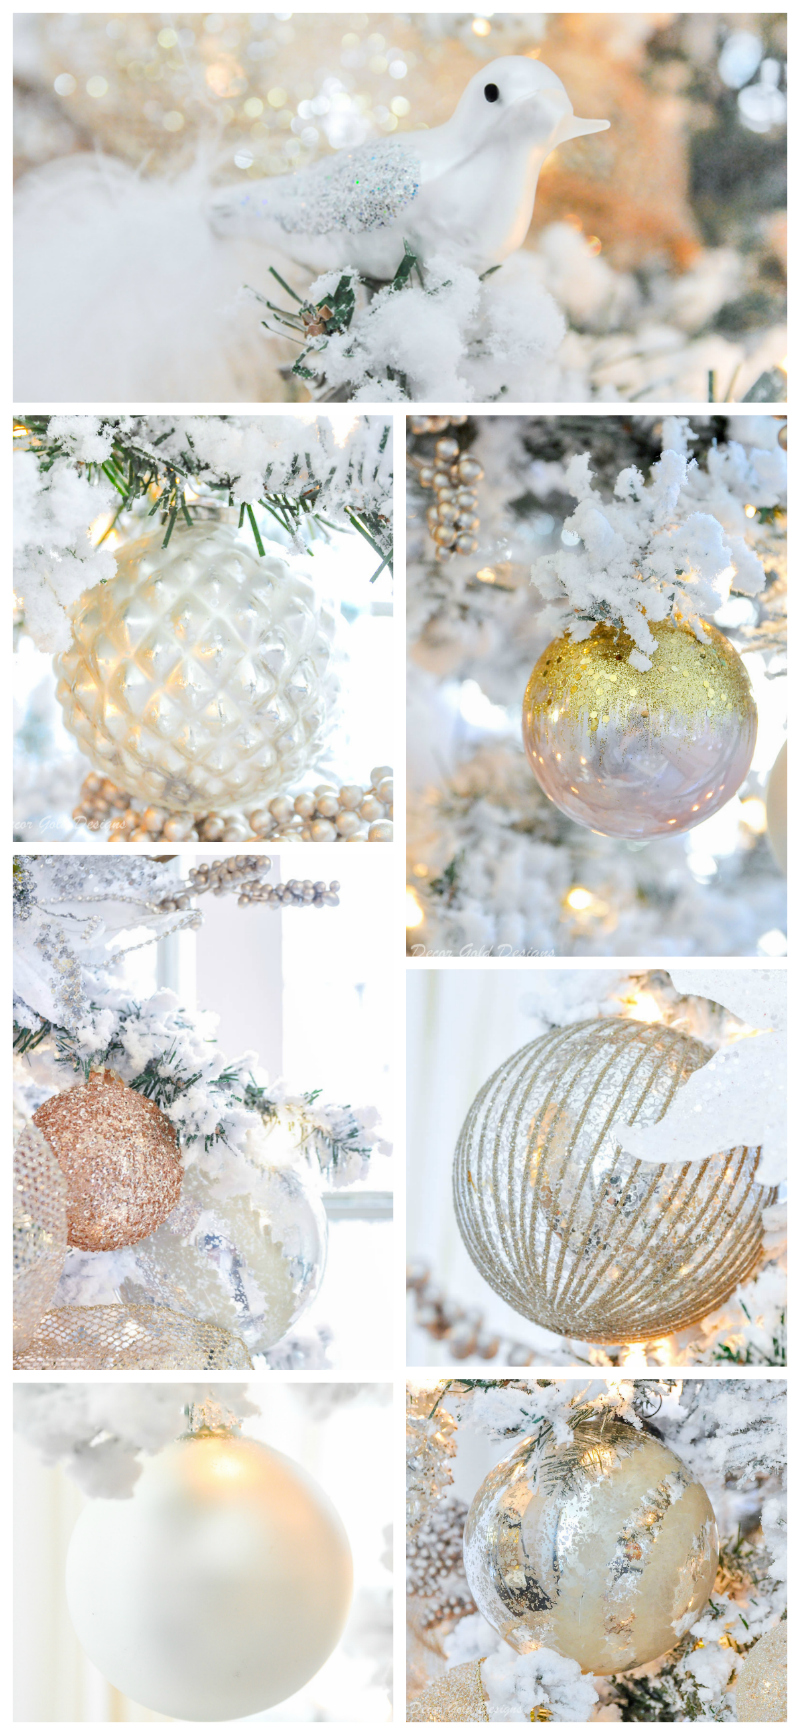
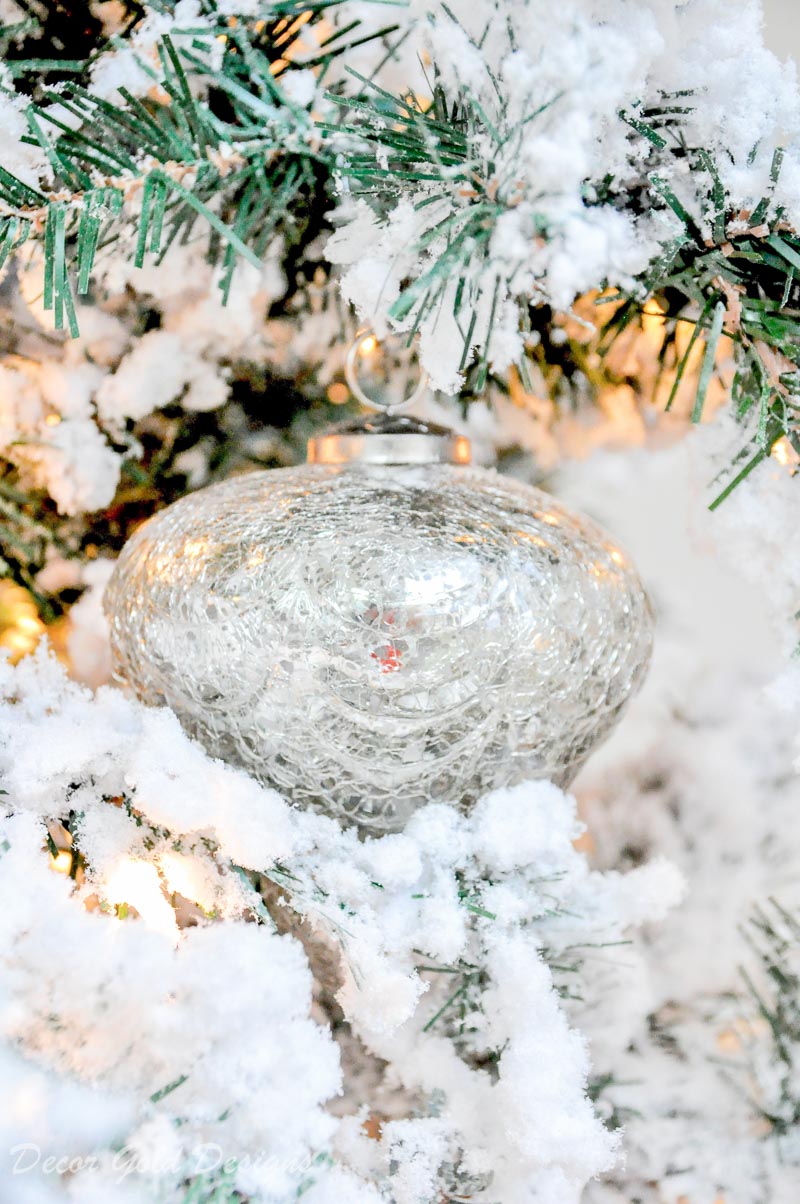
Step 5 – Add Ornaments
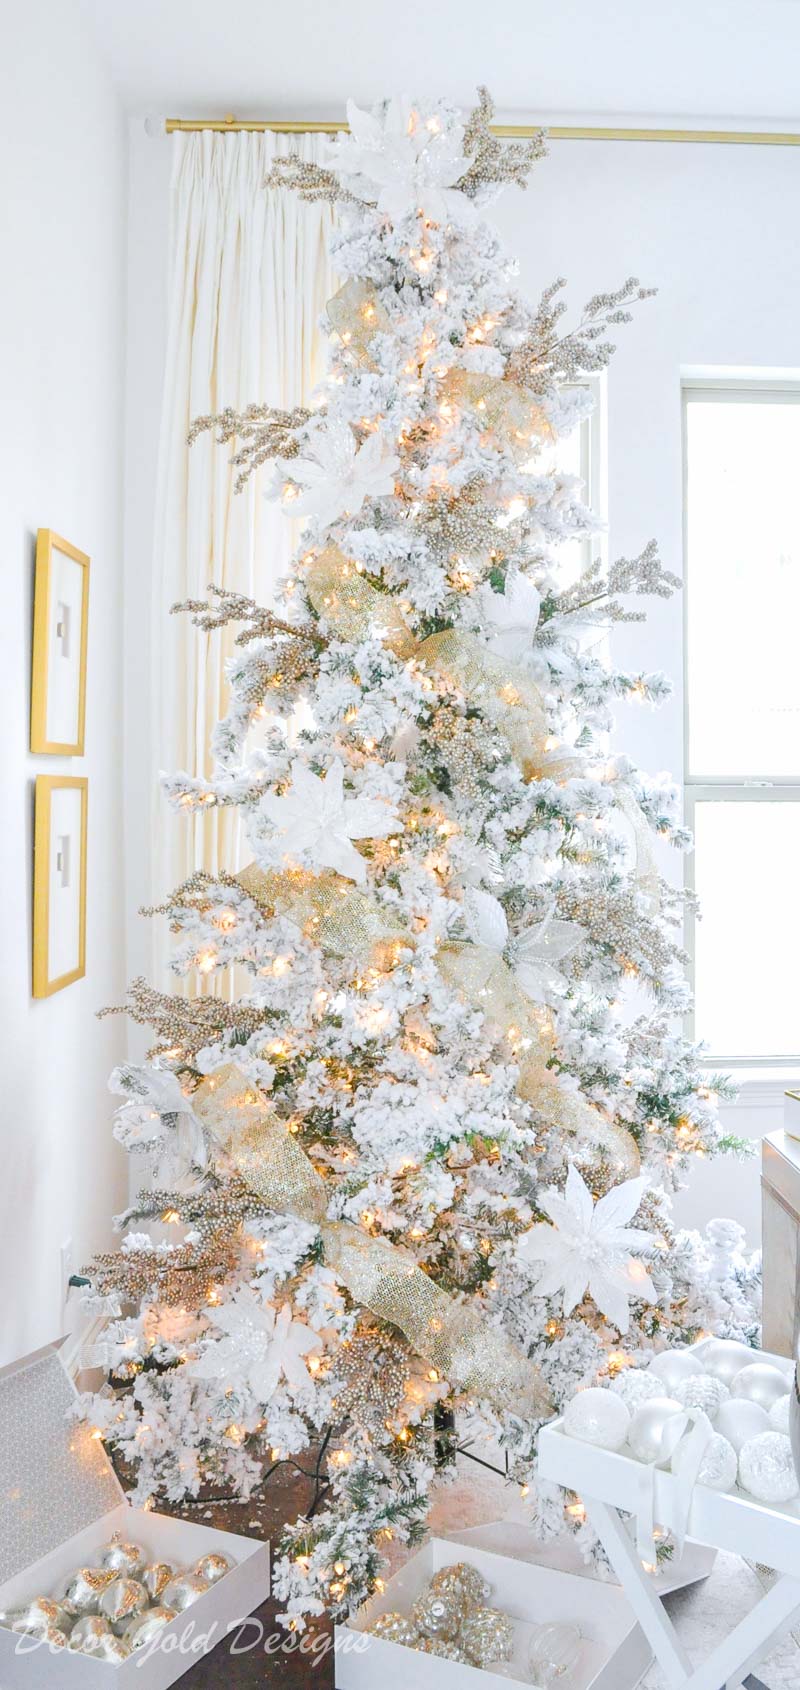
Add your large ornaments (5-7″) first. Oversized or large ornaments are stylish and sophisticated. You don’t need a lot of them. I only used six on this tree.
Next, add medium ornaments (3-5″), then add specialty ones. I included some pinecones and birds. Be sure to spread all of the sizes all over the tree.
Note: If you are only decorating part of your tree (the front and sides), use a few heavy ornaments to balance the weight. Mine sits in the corner of this room, so I only decorated about 2/3 of it.
Shop Ornaments
8 Mercury Glass Ornaments
8 White/Pearl/Ivory/Dove Gray Ball Ornaments
6 Glitter Pinecone Ornaments
2 Gold Glass Ornaments
16 Rose Gold & Glitter Ornaments
Step 6 – Create a Topper
You can use a purchased topper or make one. It’s nice to group picks to create one that coordinates with your tree. Simply stick the stems of the picks along the top of the center pole of the tree. Use at least three pieces, one on each side and one in front of the top vertical tree branch. If needed, secure by wrapping the picks and top of your tree with florist wire.
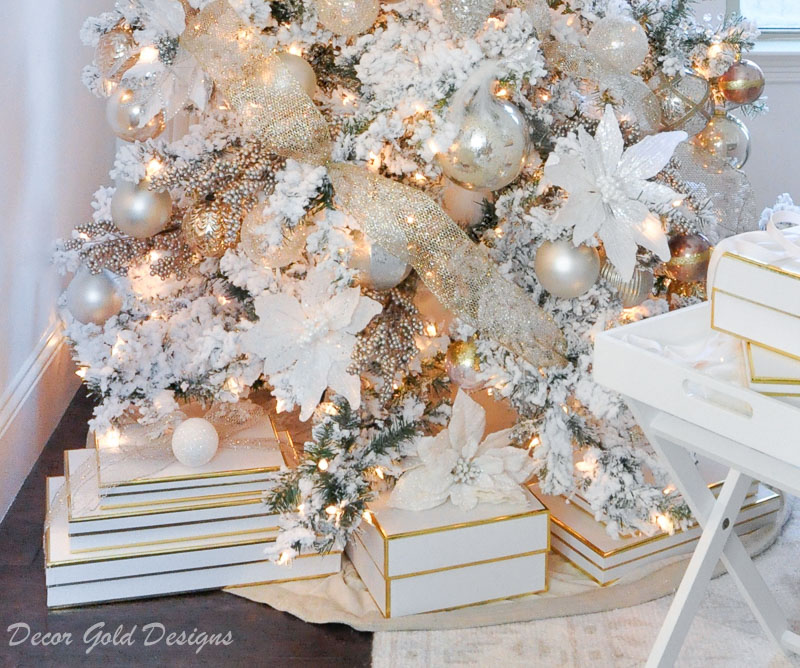
Step 7 – Style the Base
Use a tree skirt or collar, gift boxes, and other decorative items to give the base of your tree a finished look. Use decorative gift boxes like these with ribbons even before you’ve filled them with gifts.
Step 8 – Admire Your Finished Tree
This is a good time to adjust anything that looks a bit off. At the end of each step, and especially just before you finish, step back and make sure each side has a similar amount of ornaments and generally looks balanced.
Now, enjoy!!!
See this full space in my Christmas Dining Room and my other tree with soft blue accents here.
Get the Look
16 Taupe Berry Picks
6 White Poinsettias
4 White & Silver Poinsettias
8 Mercury Glass Ornaments
8 White/Pearl/Ivory/Dove Gray Ball Ornaments
6 Glitter Pinecone Ornaments
2 Gold Glass Ornaments
16 Rose Gold & Glitter Ornaments
Glitter Gold Ribbon
I hope you found this helpful!
I hope you’ll stay connected…..
Click on the Image to Subscribe
SOCIAL
Instagram | Pinterest | Facebook
Follow me on the LIKEtoKNOW.it app!
I usually add the picks at the end in the places that were left uncovered by ornaments.
You totally gave some good tips! I love your tree! Soft and sparkling and beautiful! Thanks so much! Love your blog too!